Automating the Android Build and Release Process using Fastlane & Circle CI-Part 4
This is Part 4 of the blog series Automating the Android Build and Release Process using Fastlane. In case you haven’t read the 3 posts that precede this one, here are links to Part 1, Part 2 and Part 3.
This will be a somewhat long and detailed post, so I would recommend that you grab a cup of coffee as you begin reading this. ☕️
GOAL: The goal of this article is to demonstrate how to implement Automated App Distribution to the Play Console & leverage Build Variants and Branching Techniques for Deployment to different environments. 🛠
NOTE: Start by deploying your app on the play store and ensure it has been approved. This is a requirement for successful app deployment to the play store using Fastlane.
Specify Build Variants
The first step is to set up build variants depending on your project's requirements. At my current place of work, we have dev, qa, and production environments which point to different endpoints.
So we create build variants of our apps to cater for these environments. Add these under the productFlavors {} closure under app/build.gradle
dev {
    dimension "env"
    applicationIdSuffix = ".dev"
}
qa {
    dimension "env"
    applicationIdSuffix = ".qa"
}
prod {
    dimension "env"
    applicationIdSuffix = ".prod"
}
Create the google-services.json files on Firebase dashboard
We need to create google-services.jsonfiles for the new build variants we have created (i.e)dev and qa

In the Firebase console, click on the Project Overview icon and select Project Settings. This will load the screen below:

Click the Add App button and it will launch the screen below:

- Register app — Fill the relevant package names for the new variants. (One for dev & the other for qa).
- Download the config file. (google-services.json)
- No need for step 3 & 4 — already set up.
- Run app.
- Back in Android Studio, create the dev and qa packages and add the relevant files there. (google-services.json)
Update decode_gservices_key on config.yml
Update decode_gservices_key in the config.yml file to reflect for the dev and qa environments we have added.
NOTE: You also need to update new google-services.json file on the Circle CI Environment Variables. Refer to my previous blog post on how to do this as highlighted in Step 4 under Firebase App Distribution. Delete the old key and create a new one with the same name. GOOGLE_SERVICES_JSON
Jobs and Branches
I will set up the different build variants to do run different actions:
- dev variant: With this variant, I will do the following actions:
- Build Application
- Run Unit Test
- Run Instrumentation Test with Firebase Test Lab
- Send debug or release apk to Slack
2. qa variant: With this variant, I will do the jobs like in dev variant but will add the following:
- Deploy APK to Firebase App Distribution.
3. pro variant: With this variant, I will do the jobs like in qa variant but will add the following:
- Deploy APK to Internal Test Track.
We will have 3 branches in the Github repository:
- release (pro variant)
- master (qa variant)
- feature-branches & pull requests (dev variant)
Build App
Now let’s start work on the Fastfile . We will create lanes to run builds, tests and deploy APKs. Then every lane should have parameters for build type (Debug, Release) and build flavor (dev, beta, pro). This will make more sense as we go along with the rest of the steps.
Let’s create a lane named assemble_build to build our app. This lane builds our app with specified buildVariant (buildFlavor + buildType)
|options| is your lane parameters. For more about lane parameter, you can read this at Advance Lanes.
To run assemble_build lane with parameters above we can run the command below:
$ bundle exec fastlane assemble_build build_flavor:"YourBuildFlavor" build_type:"YourBuildType"
Update Unit Test Lane
We will update the unit_tests lane to run unit tests for the specified build variant of our app.
Add instrumented tests to the build process.
In the Fastfile, add a lane to do the work of running instrumented tests. I used this Fastlane Doc as a reference:
desc "Run Instrumented tests"
lane :instrumented_tests do |options|
  gradle(task: "connectedProdDebugAndroidTest")
end
We will create a lane named instrumentation_test that leverages the Firebase Test Lab to run the UI tests. To use Firebase Test Lab in your project:
- Set up Firebase following this Instruction.
- Go to Google Cloud Console.
- Select your project
- Click on IAM & admin > Service accounts as seen in the screenshot below:

5. Click on the CREATE SERVICE ACCOUNT button and fill in Service Account Name. Then click the CREATE button as seen in the screenshots below:


6. On the next screen under the Select a role drop-down filter, select Project > Owner then click the Continue button. See the screenshot below:

7. The 3rd screen is optional, so just click the Done button. See the screenshot below:

8. This will return you back to the Service Accounts screen where you can see your new service account. Click on the overflow button, then select the CREATE KEY > Choose JSON > Create as seen in the screenshot below:

9. The result will download the private key json file to your computer for you to leverage in your project.
fastlane-droid-8684e207a8fe.json — This is the downloaded file that contains the GCLOUD_SERVICE_KEY needed below.
Add the Firebase Testlab Fastlane Plugin
Now that we have the JSON file from Google Cloud, we just need to add and configure the Fastlane plugin.
- Add the plugin:
$ bundle exec fastlane add_plugin run_tests_firebase_testlab - This adds the plugin to your Pluginfile. Ensure it is checked into source control along with the Gemfile,and Gemfile.lock and Pluginfile.

Create a new lane to run Instrumented Tests in the Fastfile. Update this lane and leverage the assemble_build lane we created earlier.
You can see available devices here and if you want to check all the parameters that you can use, just take a look at the fastlane-plugin-run_tests_firebase_testlab README file.
Now, to run the tests in Firebase TestLab, the plugin needs three things:
- app apk
- android test apk
- account auth key
NOTE: Since we have created
assemble_build, we can build both app apk and android test apk.
Now let’s take a look at lane above:
@app_apk and @android_test_apk : are variables to store the APKs after we build app.
Actions.lane_context[SharedValues::GRADLE_APK_OUTPUT_PATH] : This is the fastlane gradle output variable. We can get the APK path from it. For more details you can run: $ bundle exec fastlane action gradle
To run Firebase Test Lab with Fastlane, we have another step to finish:
- Enable Cloud Tool Results API for your project. API to publish and access results from developer tools. See the ScreenShot below.

- Install Google Cloud SDK on your computer. (NOTE: This is an optional step if you want to run it locally without CircleCI)
- Provide Google Auth Key:
run_tests_firebase_testlabplugin has created an environment variable nameGCLOUD_SERVICE_KEYso we can use it in CircleCI environment variable. We will implement this in CircleCI shortly.
The screenshot below shows the 2 major env variables that you should add to your Circle CI:
[1] GCLOUD_SERVICE_KEY - These are the contents of the private key json file that we downloaded above.[2] FIREBASE_PROJECT_ID - This is one of the properties found in the private key json file.

NOTE: Run locally to test that it works.
- If you want to run it locally, you can create
.envfile in your root project and addGCLOUD_SERVICE_KEY='your_google_service_account_json_file_content'into the.envfile.
Note: Don’t commit your
.envfile & the firebase directory to source control.
- So now you can run Instrumentation Test in your terminal using the following command:
$ bundle exec fastlane instrumentation_tests_testlab build_flavor:"qa". - When the tests finish running, you will have folder called
firebase/ - This folder contains the APKs and logs of the test cases.
NOTE: If the command fails, you can try cleaning the project first before running it.
Branch Strategy
We will start by creating the different branches & have them point to different deployment pipelines.
- Master — This branch maps to the QA environment & deploys to Firebase App Distribution and Slack Deployment.
- Feature Branch/Pull Request — This branching model maps to the Dev environment for daily development. When we have work that’s ready for QA testing, we merge these branches.
- Release —This branch maps to the Production environment & deploys to the internal test track on the Google Play Console.
Update config file to accommodate build types and build flavors
Update the config.yml file and link the build variants to the respective branches.
[1] We’ll start with `test_unit` job.
- The update ensures the job accommodates the different build variants and environments our project supports.
[2] `test_instrumentation` job.
- The update ensures the job accommodates the different build variants and environments our project supports & then runs the instrumentation_tests_firebase_testlab lane.
- This lane assembles the app and run tests in the Firebase TestLab. Then downloads the test results.
Send Debug and Release APK: Aftertest_unitandtest_instrumentationpass we can send debug and release apk to slack.store_artifacts: Stores the test results downloaded from Firebase to CircleCI artifacts.
PlayStore Deployment
Next, we will create a job to deploy a production build variant of our app to the Google Play Console Internal Test track. To upload our APK & metadata to the play store, we will leverage the fastlane supply tool.
Since supply needs authentication information from Google, we will implement the Setting Up Supply steps from Fastlane Docs, some of which are covered below:
Setting up supply
Supply is a Fastlane tool that uploads app metadata, screenshots, and binaries to Google Play Console. You can also select specific tracks(internal test, alpha, beta) for your builds and promote builds to the production.
We will begin with the first step of collecting our Google credentials.
- Open the Google Play Console
- Click Settings menu entry, followed by API access

NOTE: In my case, since I hadn’t worked with the API Access before, I had to link my account to a Google Developer Project to enable API access for my account.
3. Click the CREATE NEW PROJECT button. This sets up our account and updates the screen to show the contents below:

4. Click CREATE SERVICE ACCOUNT button & it will launch the dialog below:

5. Follow the Google Developers Console link in the dialog, which opens a new tab/window:
- Click the CREATE SERVICE ACCOUNT button at the top of the Google Developers Console.
- NOTE: The Service Account is of type Google Play Android Developer.

6. Provide a Service Account Name & Service Name Description and click the Create button.
7. Click Select a role and choose Service Accounts > Service Account User
8. Click the Create Key button & make sure JSON is selected as the Key Type.
- Click the Create button. This downloads and saves a private key to your computer.
9. Click Done button to close the dialog & you should see the screen containing your newly created service account details:

Take note of the file name of the above JSON file downloaded to your computer.
Play Console Wrap Up
- Back on the Google Play Console, click DONE to close the dialog.
- Click on the Grant Access button for the newly added Service Account.
- Choose Release Manager from the Role dropdown. Choosing Release Manager grants access to the production track and all other tracks. )
- Click ADD USER to close the dialog.
Ensure successful setup
- Copy the JSON file into the root directory, rename it to google-play-json-key-file.json and add it to .gitignore
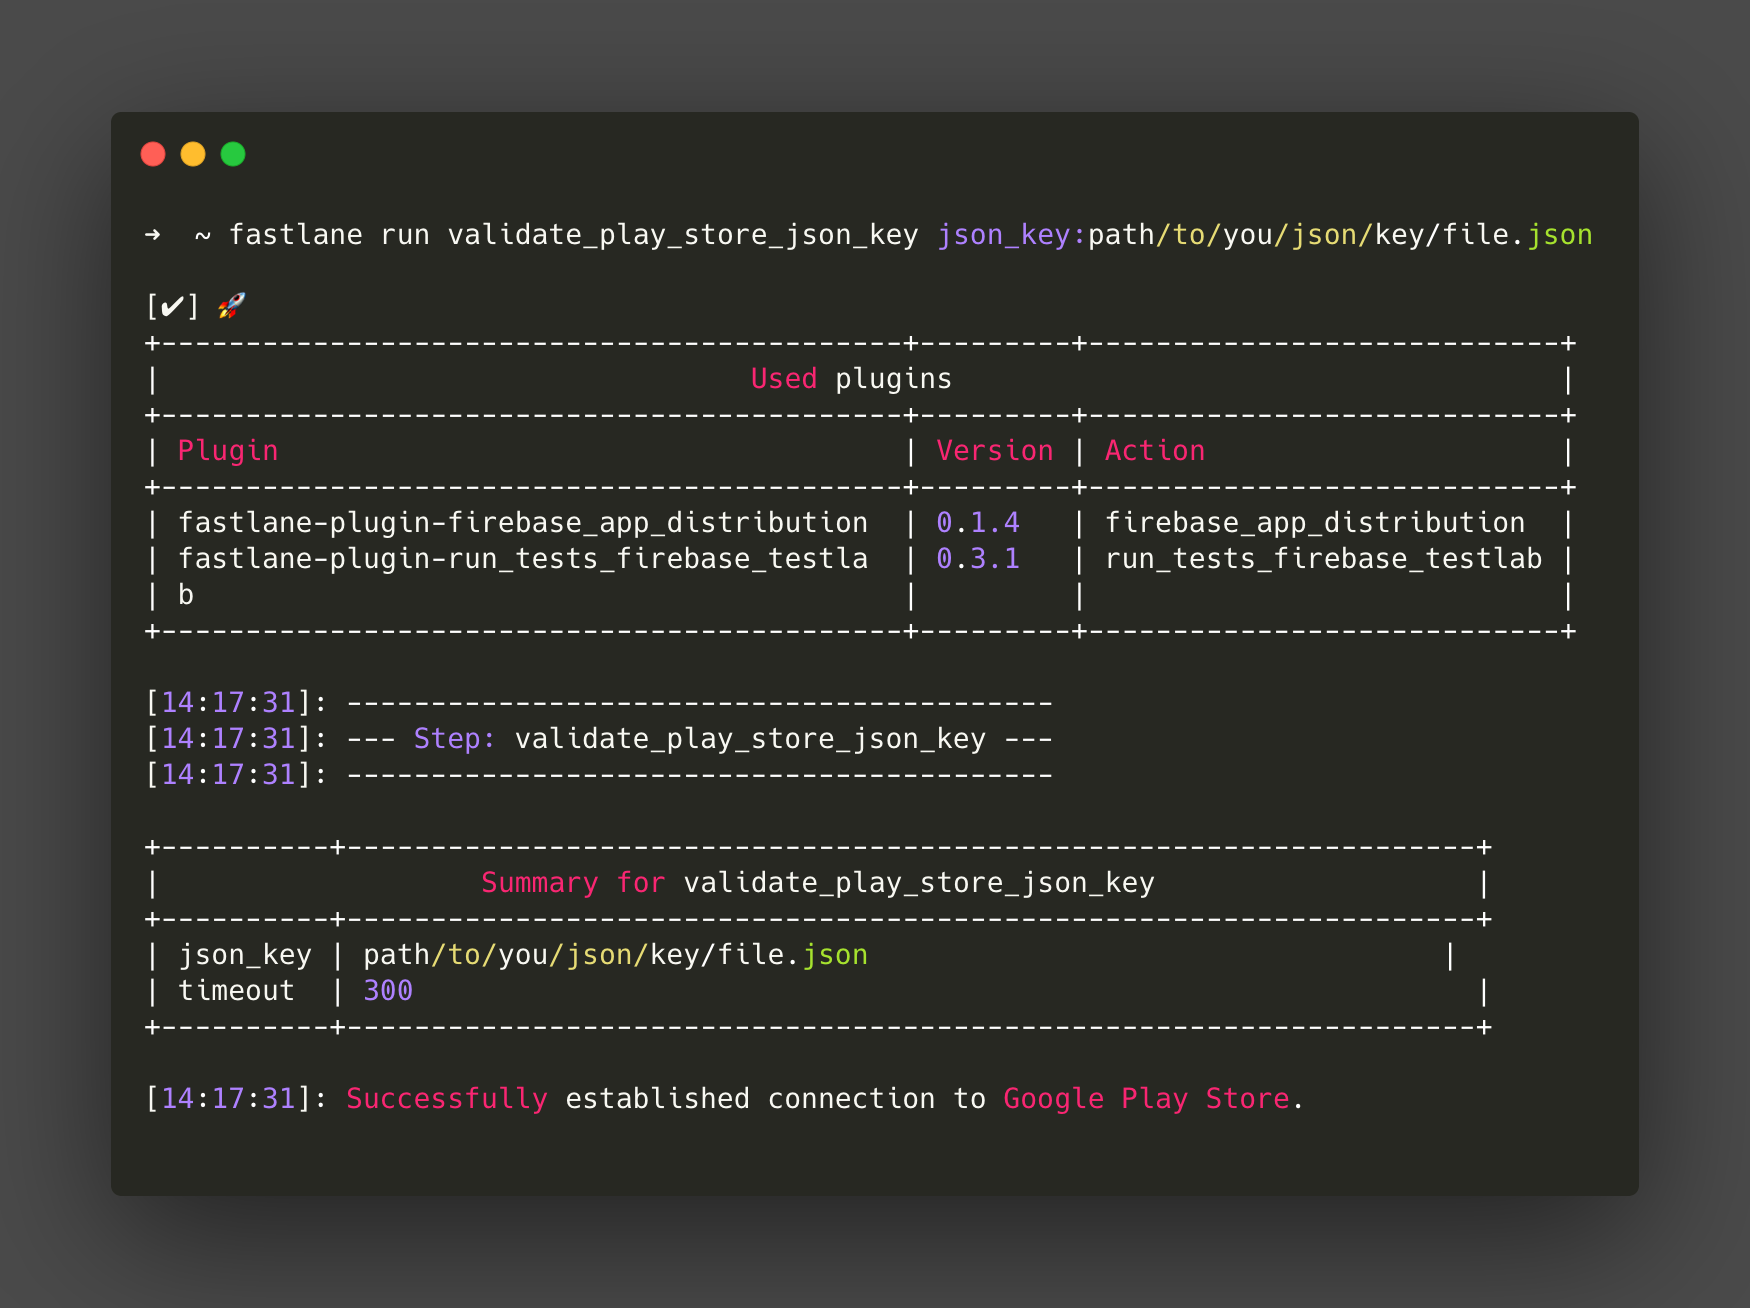
- You can use this Fastlane action to test and validate your private key json file used to connect and authenticate with the Google Play API. Run the action in your command-line interface:
fastlane run validate_play_store_json_key json_key:/path/to/your/downloaded/file.jsonIf all works well, you should see a message similar to this in your console:
Configure supply
Edit your fastlane/Appfile and change the json_key_file line to have the path to your credentials file:
json_key_file "/path/to/your/downloaded/google-play-json-key-file.json"We also need to ensure that we add the base64 encoded version of the google-play-json-key-file.json to the Circle CI environment variables.

NOTE: We will need to update the config.yml file to decode this JSON Key and make it available to the Appfile in our project. See the gist below:
Fetch your app metadata
If your app has already been deployed & approved on the play store, you’re ready to start using supply to manage it.
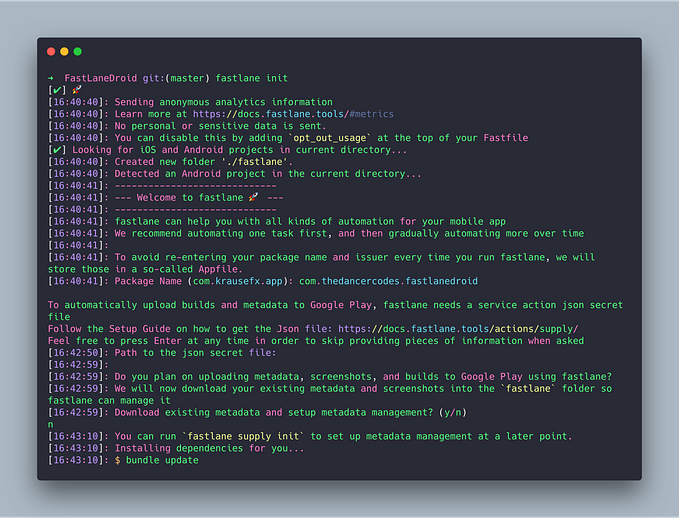
When you run the action fastlane supply init, all of your current Google Play store metadata will be downloaded to fastlane/metadata/android.
In my case, I experienced an error although the process was successful. It downloaded all the metat data except the changelogs directory.
I did some research online but didn’t seem to find a solution at the writing of this post. I have submitted the issue to the fastlane repo here.
Play Store Deployment Wrap Up
- Back to Play Store Deployment. Now that we have finished setting up supply, we can now deploy our app to Google Play Developer Console using fastlane.
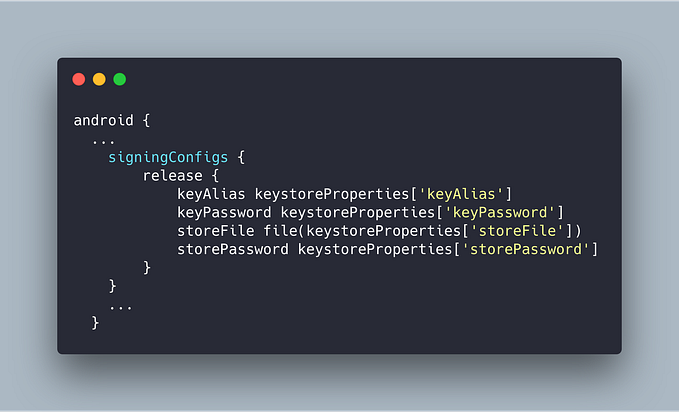
- Let’s create a lane named playstore, that will create a signed APK and upload it to the internal test track of the Google Play Console & a Slack Channel as well. (To create a signed APK, you can look my previous post)
- Next, we will need to update the Version Code and Version Name of our project in app/build.gradle.
- The Google Play Console won’t allow you to upload your APK if another APK with the same Version Code and Version Name values exists in the Play Store.
Testing the Playstore Deployment
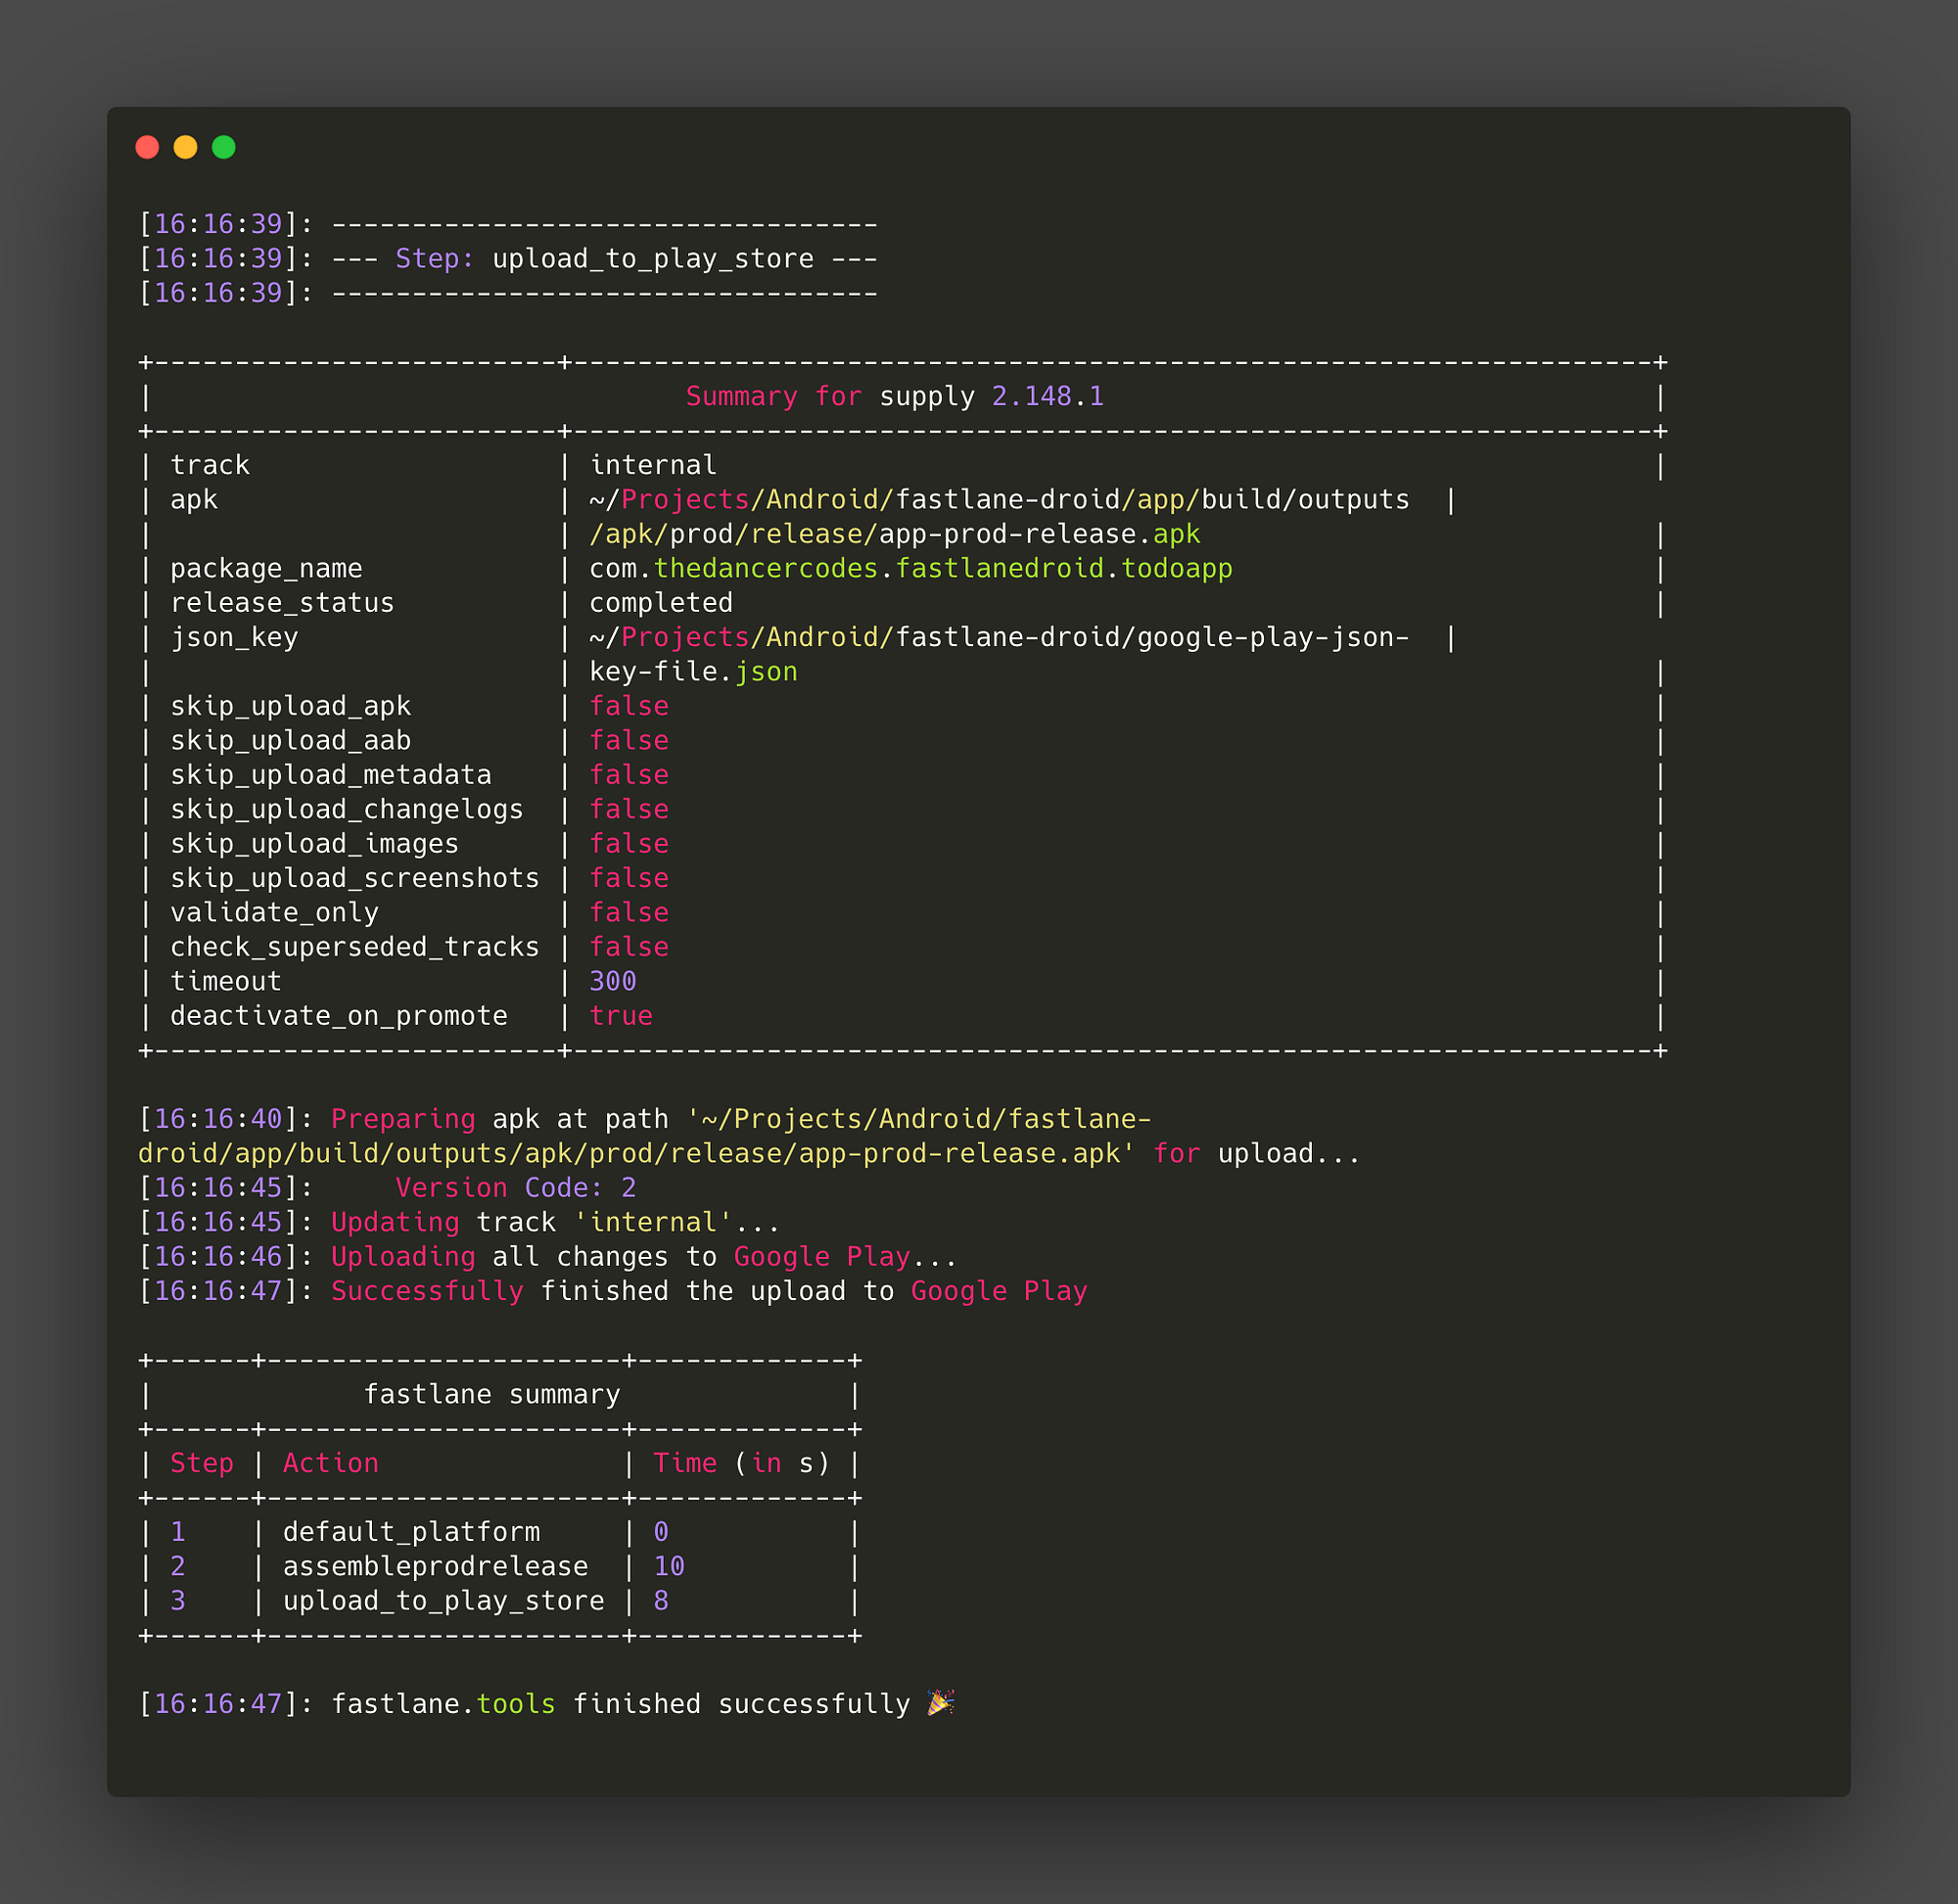
To test this out, run this command on your command-line interface:
bundle exec fastlane playstore build_flavor:"prod" build_type:"release"The command generates and deploys a prodRelease build variant of the application. The output will look something similar to this:
You will also see the new release on the track that you released it to, in our case the Internal test track:

The reason why we use the Internal Test track then promote to Production instead of directly pushing to Production is to provide the ability for QA testing to ensure the application is stable before being shipped to our users.
Config file Update
Here we will add the final touches to the config.yml file.
In the workflow below, we start by executing the job that runs our unit tests ( test_unit). Then we specify the test_instrumentation job that requires the test_unit job to finish running successfully.
If both of the jobs that run the tests terminate without errors, we still have other jobs. But they will only run when we push code to master or release branches.
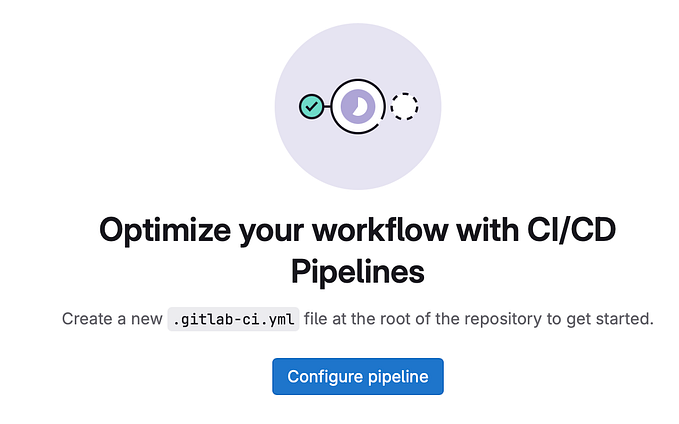
For the full .circleci/config.yml file, you can find here.
Success!! 🚀
If you have gotten to this point, Congratulations!!
Below is a video showing how our build works across the different build environments.
I know that this post has a lot of information & I thought that creating a companion video showing you how the completed project works would be of great use.
If you have any questions, feel free to reach out. Feedback is also welcome.
Next steps:
I plan on writing a final blog post that will incorporate topics like:
- Developer Productivity Engineering Concepts in Android
- Improving Build Speeds with Gradle Build Cache.
- Unified code coverage reports for both Unit and UI tests.
- Android Build Modularization and much more.
Thank you for reading.
Here’s the link to the branch for this example on Github