Understanding Window Insets in Jetpack Compose

What are Insets?
Insets refer to the areas on a screen that are not fully usable for our app’s UI due to system UI elements like the status bar, navigation bar, display cutouts (often referred to as the notch or pinhole), and the IME keyboard.
By default, our app’s UI is restricted to being laid out within the system UI, like the status bar and navigation bar. This ensures that system UI elements don’t obscure the app’s content.
Then why should we worry about Insets at all?
It is recommended apps opt-in to display in these areas where system UI is also being displayed (going edge-to-edge), which results in a more seamless user experience and allows our app to take full advantage of the window space available to it.
As modern smartphones embrace edge-to-edge screens and diverse aspect ratios, the management of insets has escalated in importance.
“With great power comes great responsibility”
In essence, we’re shifting from a system-controlled insets paradigm to one where developers actively engage in enabling edge-to-edge displays or drawing behind system UI elements, thus taking control of insets management!
How to get started?
Initial Setup
We have to get our app full control of the area where it will draw the content. Without this setup, our app may draw black or solid colors behind the system UI, or not animate synchronously with the software keyboard.
- Call the enableEdgeToEdge function in Activity
onCreate.
This call requests that our app display behind the system UI. The app will then be in control of how those insets are used to adjust the UI.
override fun onCreate(savedInstanceState: Bundle?) {
    super.onCreate(savedInstanceState)

    enableEdgeToEdge()

    setContent {
        // App content here
    }
}- Set
android:windowSoftInputMode="adjustResize"in our ActivityAndroidManifest.xml.
This setting allows our app to receive the size of the software IME as insets, which we can use to pad and lay out content appropriately when the IME appears and disappears in our app.
<activity
  android:name=".ui.MainActivity"
  android:label="@string/app_name"
  android:windowSoftInputMode="adjustResize"
  android:theme="@style/Theme.MyApplication"
  android:exported="true">
Let’s have a look at how our app looks like at this point with the below code:
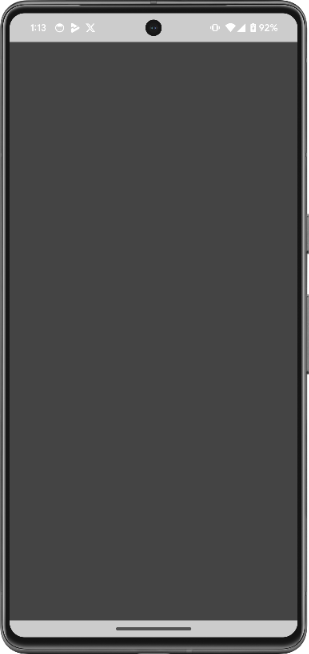
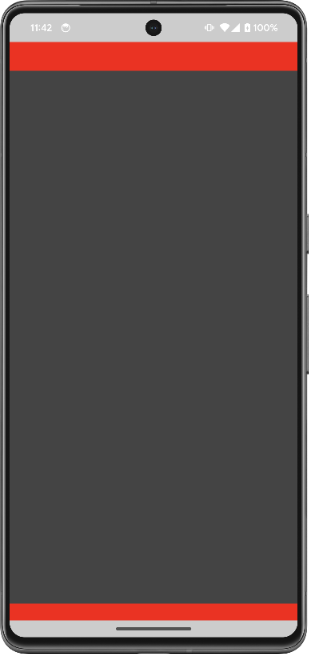
setContent {
    Box(
        modifier = Modifier
             .fillMaxSize()
             .background(color = Color.DarkGray)
       )
}
We can see that the colored Box has filled the entire screen and drawing even behind the system bars (top status bar and bottom navigation bar). This means, that now our code is capable of drawing behind the system UI and we can control these areas ourselves!
Controlling Insets
Once our Activity is displaying behind the system UI and has taken control of handling all the Insets manually, we can use the Compose APIs to ensure that our app’s interactable content does not overlap with the system UI.
These APIs also synchronize our app’s layout with inset changes.
There are two primary ways to use the Inset types to adjust our Composable layouts: Padding Modifiers and Inset Size Modifiers.
Padding Modifiers
We can use Modifier.windowInsetsPadding(windowInsets: WindowInsets) to apply Window insets as padding. It works very similar to Modifier.padding.
There are some built-in Window insets like WindowInsets.systemBars, WindowInsets.statusBars, WindowInsets.navigationBars, etc. which we can use to provide the desired padding.
For example in the previous code, if we want to leave out the status bar and navigation bar and then draw the Grey box we can do:
setContent {
    Box(
        modifier = Modifier
            .fillMaxSize()
            .background(color = Color.LightGray)
            .windowInsetsPadding(WindowInsets.systemBars)
    ) {
        Box(
            modifier = Modifier
                .fillMaxSize()
                .background(color = Color.DarkGray)
        )
    }
}
Modifier windowInsetsPadding(WindowInsets.systemBars) adds padding for the top status bar and bottom navigation bar, which are colored with LightGray for understanding. This will make our app look like this:
We can also use windowInsetsPadding(WindowInsets.statusBars) or windowInsetsPadding(WindowInsets.navigationBars) to control these Insets separately.
There are also many built-in methods for the most common types of Insets. For example:
safeDrawingPadding(), equivalent towindowInsetsPadding(WindowInsets.safeDrawing)safeContentPadding(), equivalent towindowInsetsPadding(WindowInsets.safeContent)safeGesturesPadding(), equivalent towindowInsetsPadding(WindowInsets.safeGestures)
Inset size modifiers
These modifiers help in setting the size of a component to the exact size of the insets. These are useful for sizing a Spacer that takes up an Inset size while creating a screen.
For example, we can write the last code like this using Inset size modifiers to provide padding for the status bar and navigation bar. This will produce the same result:
setContent {
    Column {
        Spacer(
            modifier = Modifier
                .fillMaxWidth()
                .background(color = Color.LightGray)
                .windowInsetsTopHeight(WindowInsets.statusBars)
        )
        Box(
            modifier = Modifier
                .fillMaxSize()
                .background(color = Color.DarkGray)
                .weight(1f)
        )
        Spacer(
            modifier = Modifier
                .fillMaxWidth()
                .background(color = Color.LightGray)
                .windowInsetsBottomHeight(WindowInsets.navigationBars)
        )
    }
}
Here instead of adding Insets padding to the DarkGrey Box like the last time, we added LightGray Spacers which take up the exact sizes of the status bar and navigation bar.
Resize component padding with Keyboard IME
There are times when we would want to apply dynamic padding to our UI component based on whether the keyboard IME is open or closed. A good use case is when we add an input field at the bottom of a list.
Consider this code:
setContent {
    Column(
        modifier = Modifier.fillMaxSize().systemBarsPadding()
    ) {
        LazyColumn(
            modifier = Modifier.weight(1f),
            reverseLayout = true
        ) {
            items(100) { index ->
                Text(text = "Item $index", modifier = Modifier.padding(16.dp).fillMaxWidth())
            }
        }

        var textFieldValue by remember { mutableStateOf(TextFieldValue()) }

        TextField(
            modifier = Modifier.fillMaxWidth(),
            value = textFieldValue,
            onValueChange = { textFieldValue = it },
            placeholder = {
                Text(text = "Type something here")
            }
        )
    }
}
If we do not handle the padding for the TextField:
Here we can see that when the keyboard opens, the TextField stays at the bottom of the screen, which does not provide a very good user experience.
After handling the TextField padding:
We will just add the imePadding() modifier to the TextField above.
The code will now look like:
// Same code as above

TextField(
    modifier = Modifier.fillMaxWidth().imePadding(), // IME padding added
    value = textFieldValue,
    onValueChange = { textFieldValue = it },
    placeholder = {
        Text(text = "Type something here")
    }
)
Now, the TextField padding will change and also animate with the changing state of the IME and thus will produce an effect that the input field is moving up along with the keyboard:
Animate keyboard IME while scrolling:
There is another experimental API modifier imeNestedScroll() which when added to a scrolling container, animates and opens the keyboard when scrolling to the bottom of the container.
If we modify the above code, by adding this modifier to the LazyColumn:
// Same code as above

LazyColumn(
    modifier = Modifier.weight(1f).imeNestedScroll(), // Modifier added
    reverseLayout = true
) {

// Same code as previous
Will produce this experience:
Insets Consumption
Now, a few questions might pop into our minds at this point.
Considering any inset padding modifier (say safeDrawingPadding()), do we need to apply it only once in the Composable hierarchy? What will happen if we apply it more than once? If we apply it to a parent and then again to a child below, will the padding be added twice?
Well, here comes the concept of Insets consumption.
The in-built inset padding modifiers automatically “consume” the portion of the insets that are applied as padding. While doing deeper down the composition tree, the nested inset padding modifiers and the inset size modifiers, which are applied to the child composables know that some portion of the insets has already been consumed (or applied or considered) by the outer modifiers, and hence skip applying those insets again, thus avoiding duplication of space.
Let’s see an example to understand this:
setContent {
    var textFieldValue by remember { mutableStateOf(TextFieldValue()) }
    LazyColumn(
        Modifier.windowInsetsPadding(WindowInsets.statusBars).imePadding()
    ) {
        items(count = 30) {
            Text(
                modifier = Modifier.fillMaxWidth().padding(16.dp),
                text = "Item $it"
            )
        }
        item {
            TextField(
                modifier = Modifier.fillMaxWidth().height(56.dp),
                value = textFieldValue,
                onValueChange = { textFieldValue = it },
                placeholder = { Text(text = "Type something here") }
            )
        }
        item {
            Spacer(
                Modifier.windowInsetsBottomHeight(
                    WindowInsets.systemBars
                )
            )
        }
    }
}
This code displays a long list of items in a LazyColumn. At the bottom of the list, there is a TextField for user input, and at the end there is a Spacer which provides space for the bottom system navigation bar using a window insets size modifier. Also, an imePadding has been applied to the LazyColumn.
Here, when the keyboard is closed, the IME has no height, hence the imePadding() modifier applies no padding. Hence no insets are being consumed and the height of the Spacer at this point is the size of the bottom system bar. When the keyboard opens, the IME insets animate to match the size of the IME, and the imePadding() modifier begins to apply bottom padding to the LazyColumn. As a result, it also starts “consuming” that amount of insets.
Now at this point, an amount of the spacing for the bottom system bar has been already applied by the imePadding() modifier, therefore the height of the Spacer starts to decrease. At some point in time, when the IME padding size exceeds the size of the bottom system bar, the height of the Spacer becomes zero. When the keyboard closes the same mechanism happens in reverse.
This behavior is accomplished through communication between all windowInsetsPadding modifiers.
This is how the above code looks like in action:
Let’s see another example:
In this example, we will explore the modifier: Modifier.consumedWindowInsets(insets: WindowInsets).
This modifier is used to consume insets in the same way as the Modifier.windowInsetsPadding, but it doesn't apply the consumed insets as padding.
Another modifier is the Modifier.consumedWindowInsets(paddingValues: PaddingValues), which takes an arbitrary PaddingValues to consume.
This is useful for informing children when padding or spacing is provided by some other mechanism than the inset padding modifiers, such as an ordinary Modifier.padding or fixed-height spacers.
Consider this code:
setContent {
    Scaffold { innerPadding ->
        // innerPadding contains inset information to use and apply
        Box(
            modifier = Modifier
                .fillMaxSize()
                .background(color = Color.LightGray)
                .padding(innerPadding)
        ) {
            Box(
                modifier = Modifier
                    .fillMaxSize()
                    .background(color = Color.Red)
                    .windowInsetsPadding(WindowInsets.safeDrawing)
            ) {
                Box(
                    modifier = Modifier
                        .fillMaxSize()
                        .background(color = Color.DarkGray)
                )
            }
        }
    }
}
This code will look like this:
We can see that there is some problem with this result. Though the innerPadding from the Scaffold lambda is applied, as a padding to the outer Box, the windowInsetsPadding(WindowInsets.safeDrawing) of the inner Box produces a duplicate padding (visible in Red color). That means, for some reason, Inset consumption did not happen here.
This is because, by default, aScaffold provides insets as parameters paddingValues for us to consume and use. Scaffold does not apply the insets to content; this responsibility is ours.
Thus if we want to avoid this duplicate padding, we need to consume the padding ourselves using the consumeWindowInsets(innerPadding) modifier.
Considering this as the updated code:
setContent {
    Scaffold { innerPadding ->
        // innerPadding contains inset information to use and apply
        Box(
            modifier = Modifier
                .fillMaxSize()
                .background(color = Color.LightGray)
                .padding(innerPadding)
                // Consume this insets so that it's not applied again when using safeDrawing in the hierarchy below
                .consumeWindowInsets(innerPadding)
        ) {
              // Remaining code
          }
        }
    }
}
will produce this:
Thus, once the innerPadding is consumed by the outer Box, the windowInsetsPadding(WindowInsets.safeDrawing) of the inner Box does not apply any duplicate padding.
That’s it for this article!
I trust that this piece will enlighten many developers about the necessity of Insets and guide them on their effective utilization.
You can get all the examples at this repo: https://github.com/pushpalroy/ComposeInsetsPlayground
Follow me: @pushpalroy

