Understanding Gradle: the Build Lifecycle

It is quite easy to find articles about “how to create gradle custom tasks”, “how to decrease build time”, “how to structure gradle build files” etc. But not very common to find articles about how Gradle really works under the hood. Today, let’s focus on a small part of the “dark side” of Gradle: the build lifecycle.
Before we go through the explanation of the Gradle build lifecycle, lets agree on some capital definitions in the Gradle universe.
Project
This is one of the most important concept for Gradle. In fact, a project is a representation of what needs to be built and leads to an artifact at the end of the build. For example, on Android the :app module is a Gradle project. If you have another module in your Android project (don’t get confused here), that module also is a project for Gradle.
- Projects are registered in the settings.gradle file
- Most of the time, a projet has a build.gradle file
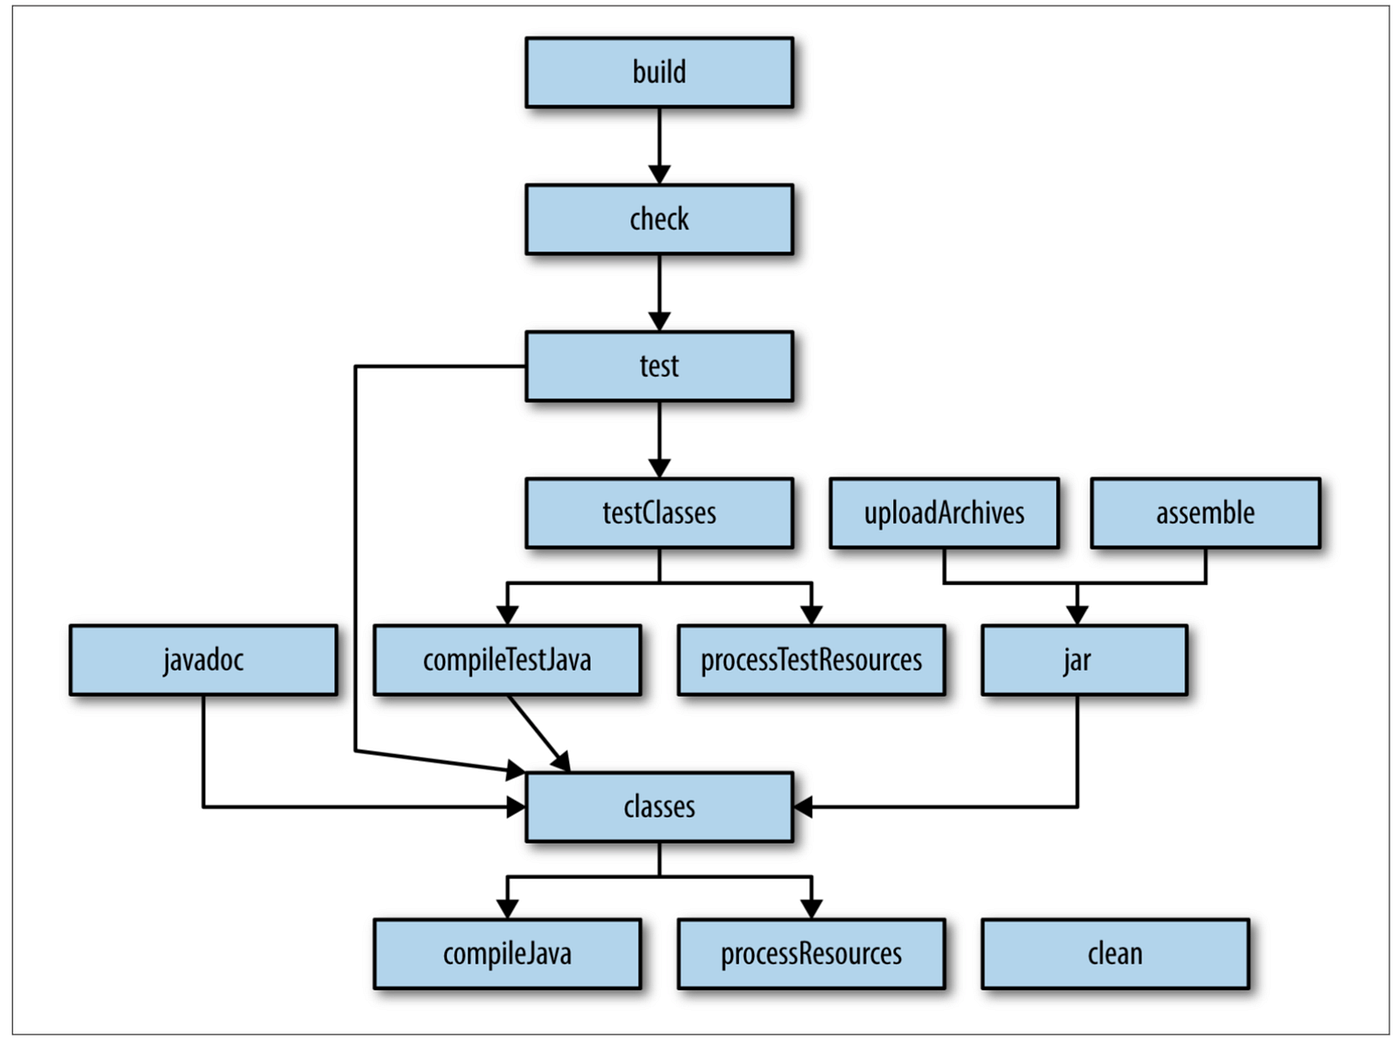
Task
A task, as the name suggests, is a representation of actions (default or custom) that need to be executed during the build process. For example, the compilation of Java code is started by a task. Tasks are defined in the project build script and can have dependencies with each other.
Now that we know these capital terms let’s dive into the main subject
Build Phases
Every Gradle build goes through 3 different lifecycle phases following the same order every time.
The initialization phase
In this phase, Gradle tries to identify all the projects involved in the build process. It is very important for Gradle to know whether it’s a Single-project build or a Multi-project build. In a Multi-project build there are several projects to evaluate. Hence, several build scripts. Gradle looks at the settings.gradle file in order to identify the different projects. At the end of the initialization phase, Gradle creates an instance of org.gradle.api.Project corresponding to each of these projects.
The configuration phase
During this phase, Gradle executes the build script of each project identified in the previous phase. Actually, it is very important to know that just because we say “Gradle executes the build scripts” does not mean that the Tasks in those build scripts are executed too. Instead, after evaluating those scripts as simple Groovy scripts and identify the tasks in it, Gradle builds a Directed Acyclic Graph (DAG) of task objects. A DAG is a mathematical algorithm for representing a graph that contains no cycles. The “directed” term means each dependency arrow goes in one direction. “Acyclic” means that there are no loops in the graph.
Also one thing to mention in the Configuration phase is that Gradle introduced a feature called configuration on demand that gives it the ability to configure only the relevant and necessary projects during the build process. This is very useful in large Multi-project builds because it could considerably decrease build time.
The execution phase
This is the last phase. During this phase, Gradle identifies the tasks that need to be executed based on the DAG of task objects created in the previous phase, and executes them according to their dependency order. All the build work and activities are actually done in this phase. For example: compiling source code and generating .class files, copying files, cleaning build directory, uploading archives, archiving files etc.
This is cool but what does it look like in real life ?
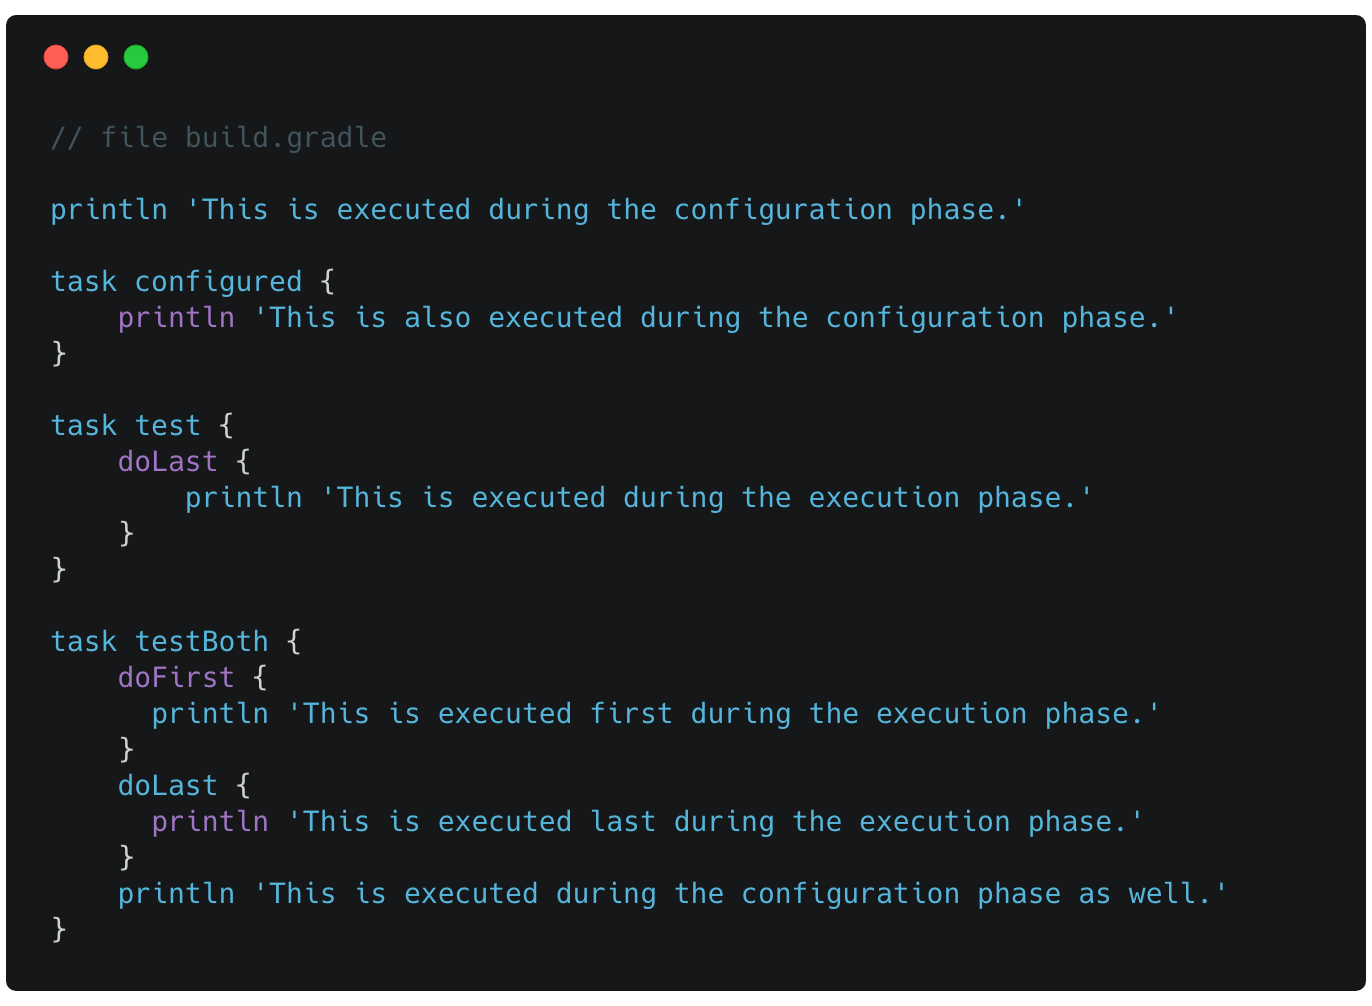
Well, in “real life” the phases could easily be identified in your gradle files. For example if you put a code in the settings.gradle file, it is evaluated in the initialization phase. The code in your build script files that are not related to actions of your tasks are evaluated in the configuration phase. And finally the code in the actual actions of your tasks like the doLast closures of your tasks are evaluated in the execution phase.
Let’s take a look:

And the result of the build after entering the command gradle test testBoth
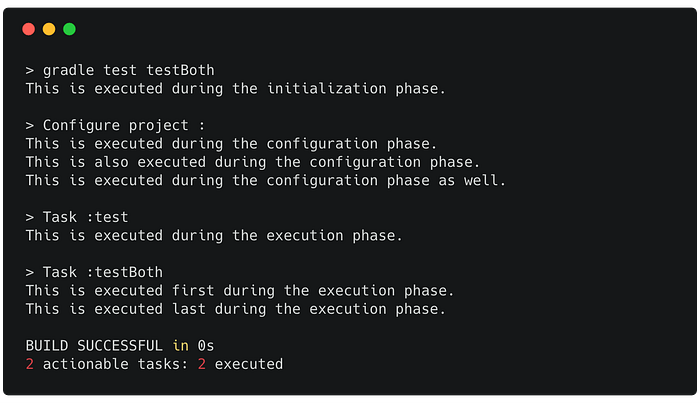
gradle test testBothLet’s wrap it up
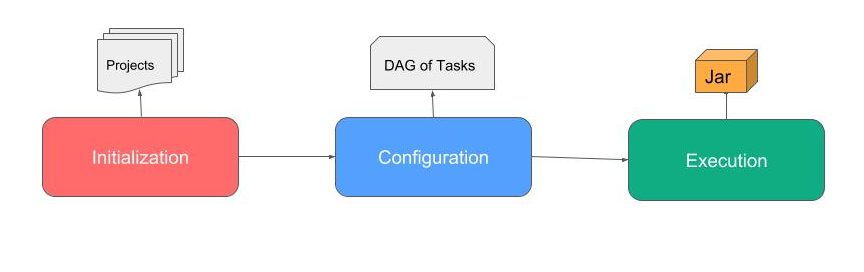
This single image can give you an idea of what we’ve been talking about throughout this article. We represent here in a very simple and stupid way the build process that takes us to the generation of a jar but it could be anything else like aar, apk, war etc.
Thank you for reading, i hope i helped you learn something new in one way or another. Perhaps i forgot something, perhaps i was wrong somewhere, if so, just leave a comment so we can discuss about it.
References
Note that here we try to give a simple and high-level explanation of all these stuff but you can dive deep in it by helping yourself with the references bellow.