Testing your first Android lint rule

In the previous article in this series on making use of custom Lint rules, we covered what is Lint and what we have to do to create a simple custom Lint rule. If you haven’t read it yet, I would highly recommend that you take a look to get some more context:
In this article, we will see what we have to do to perform unit tests to our lint rule. This will ensure non-flaky lint rules, avoiding false positives in the CI pipeline.
Context
In the previous article, we saw how to create a rule that would detect usages of the android.util.Log and would flag this as an error (since we “had decided” that we had an AmazingLog that we should use instead).
It is important to remember that our lint rule is defined in the rules module
Getting ready to test the rules
With that said, the first thing we need to do is to add a specific lint testing dependency:
dependencies {
  // these ones for creating the rules
 compileOnly "com.android.tools.lint:lint-api:lint-version"
 compileOnly "com.android.tools.lint:lint-checks:lint-version"// this one for testing
 testImplementation "com.android.tools.lint:lint-tests:lint-version"... // junit4 or junit5
}
Using lint-tests
With the testing dependency defined, we now have access to specific tools that will allow us to easily test our rule.
The first thing we have to do is to create a test which extends LintDetectorTest . This class mainly gives you methods to define the Issue that you want to use in the tests, helpers to create the files that you will use to verify if the rules are working, and ways to create a fake project file structure.
For the sake of simplicity we will do the bare minimum:
- Define our detector as
AndroidLogDetector - Define the issue we want to check as
AndroidLogDetector.ISSUE
Now, we can focus on writing our test in small steps. This test should detect if we are using the “forbidden” android.util.Log
When thinking of Lint tests you should have the following structure in mind:
- Define the “stub” file that on which we will try to detect the presence/absence of the
Issue - Run the lint checks on that stub file.
- Verify expectations in terms of the lint check result.
Let’s go over each one of these.
Defining the stub file
First, we need to define which is the type of file that we want to use. In this case, it would be either appropriate a Java or Kotlin file. We will go with a Kotlin one.
You can easily create a file is using the TestFile#kotlin method. This method takes a string that should contain the source code you want to test your Issue on.
For example, we could write:
The amazing benefit of this API is that you can have some structured, readable stub file and to which the IDE correctly highlights as if it was actual code.
Producing the lint check results
Now we just need to run lint on that stub file, so that later we can inspect the produced results. For that, we use the TestLintTask#lint method in this way:
val lintResult = lint()
    .files(ANDROID_LOG_IMPL_JAVA, stubFile)
    .run()
We pass the needed files for the execution and run the inspection!
Important: We should note that that we not only passed our created stubFile but also a ANDROID_LOG_IMPL_JAVA file. This is crucial so that our tests work correctly (for this specific case) since it defines a stub for the android.util.Log class, which Lint currently doesn’t have access.
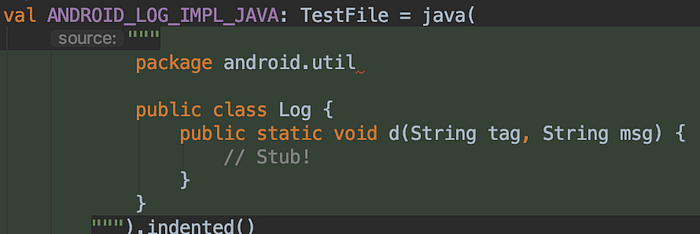
To define it, we follow the same idea as above, but this time using TestFile#java .
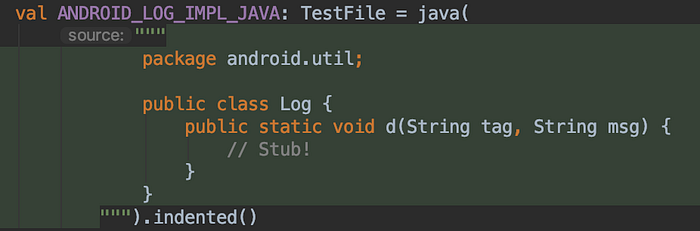
Tip: Another really neat feature is that if your code does not compile you will see that listed in the IDE. In the example below, you can see the error highlight on the package declaration as we didn’t put the ending ;
Inspecting the results
Finally, it is time for us to validate our expectations using the LintResult. Some simple assertions cover most of the cases.
Assertions on the number of issues
expectWarningCount(count)— when we expectcountwarnings to be foundexpectErrorCount(count)— when we expectcounterrors to be foundexpectCount(expectedNumberOfIssues, severity)— when we expect N amount ofissues with a specific severityexpectClean()— when we expect no issues to be found
Assertions on the result message:
expectMatches(regex)— expects that the given regex finds anything in the resulting outputexpect(expectedText)— to assert that the given message corresponds to the resulting output.
For our case, this would be enough:
With this, we would end up with the following test class:
To run the tests you just have to run:
./gradlew rules:testThe sample project that this post is based on, is available here.
What’s next?
In the following post I will go over topics:
- How to create automatic correction suggestions (as seen in the IDE)