Navigating in a pure jetpack compose project — part #2
A complete guide on how to setup the bottom navigation bar
Check out all the articles in the series:
• Navigating in a pure jetpack compose project — part #1
• Navigating in a pure jetpack compose project — part #2
The last article was about how to set up navigation in a project built purely in jetpack compose. To give an overview briefly:
> We created the NavController.
> We passed this NavController to the NavHost.
> The NavHost encapsulates all the composables we can navigate to.
> Each composable is assigned a unique string, aka a route.
This article will step up the routing game and will implement a bottom navigation bar in the project, which will provide a user the primary destinations of the project. This behaviour is standard in modern application development, and also follow Google’s modern application development guidelines.
Defining the routing strategy
Before we start setting up the bottom navigation bar, lets define a routing strategy which the navigation system must follow. For this article the bottom navigation bar will consists of 3 BottomNavigationItems, each item relates to a greek god:
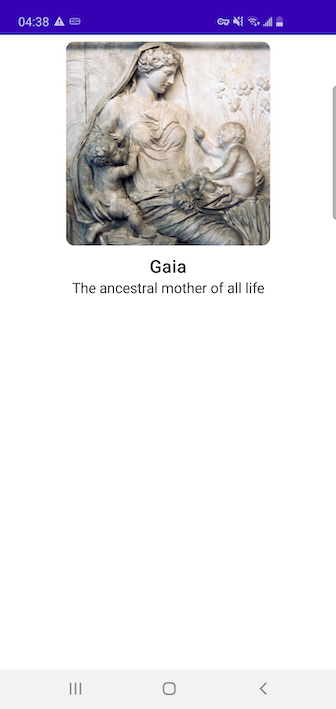
- Gaia — The ancestral mother of all life
- Poseidon — The god of sea, earthquakes, storms, and horses
- Zeus — God of all other gods
Navigation system strategy:> The bottom navigation bar will have 3 bottom navigation items.
> Each item's onClick will lead to the respective composable.
> First back button click should always lead to the start destination of the NavHost.
> Following back button click should exit the app.
Now that we have an outline of what we need to implement, let’s start with composing the 3 destination composables that we will connect with the BottomNavigationItems.
Creating a base composable
The motive for this article is to understand how to setup bottom navigation bar, and not how to create complex composables. So the composable logic will be kept straight and simple. We will first create a GodComposable . Think of it as a template, which our destination composables will simply fill with distinct data.
The purpose of creating a base composable is to simply not duplicate the same code in the destination composables.
Here is the structure for the GodComposable:
The GodComposable will take 3 parameters:• godName: String (For the <GOD_NAME> TEXT composable)
• godExcerpt: String (for the <GOD_EXCERPT> TEXT composable)
• drawableId: Int (for the <IMAGE> IMAGE composable)

and below is the actual implementation:
Creating destination composables
The logic for creating destination composables is pretty straight forward:
Setting up the scaffold
In order to setup bottom navigation bar in the project, we have to first setup the Scaffold composable.
Scaffoldimplements the basic material design visual layout structure. This component provides API to put together several material components, such as a TopBar, BottomBar, FAB or a Drawer, to construct your screen, by ensuring proper layout strategy for them and collecting necessary data so these components will work together correctly.
The logical place to set a Scaffold up would be in the setContent of the activity class. Carrying forward what was gained from the last article in the series, putting NavHost in Scaffold scope seems natural:
Due to the lack of a bottom navigation bar for the moment, our project will be in the state where the NavHost will host the starting destination composable, which is the GaiaComposable :
Before we jump ahead and customize the Scaffold composable by providing its bottomBar argument an implementation of BottomNavigation composable, let us understand what BottomNavigation composable requires for its implementation.
Understanding BottomNavigation implementation
A BottomNavigation is a component that is placed at the bottom of the screen. It consists of multiple instances of BottomNavigationItem , each of which represent a primary destination in the project.
A BottomNavigationItem has icon , label , selected, and onClick params. According to google official documentation, a sealed class called Screen should be created, where each Screen instance will contain all the data required to implement a singleBottomNavigationItem :
Customizing scaffold composable for bottom navigation bar
Though we have most of the information to properly configure each BottomNavigationItem, the selected and onClick params however need a bit more context. Luckily, the NavController is all that is needed.
NavController has access to the current backstack entry through a method called currentBackStackEntryAsState() . As the name suggests, this method returns the current NavBackStackEntry object. One can simply reach in to the current NavBackStackEntry object’s arguments and get hold of KEY_ROUTE, which is nothing but the route (String) of to that composable.
With all the pieces in hand, we can modify the Scaffold implementation, and provide its bottomBar param an implementation of BottomNavigation , and in turn provide this instance of BottomNavigation the BottomNavigationItems as follow:
the onClick param routing logic first clears the backstack upto the starting destination, and then adds the new composable on the top as a new NavBackStackEntry. This is done to ensure that we do not have long chain of routing logic when the user will generate the OnBackButtonClickEvent. Enabling launchSingleTop will take care of multiple clicks on the same BottomNavigationItem edge case.
The project will now have a functional BottomNavigation along with its BottomNavigationItem routing to their respective composables:
The project repository can be found here, and readers are encouraged to contribute to the project in any order they see fit. In the next part of the series, we will implement a master-detail relationship among the composables along with animations build entirely through compose.

