Jetpack Compose for Late Adopters
For you who’s not sure about learning jetpack compose or not
Why not learn earlier?
There’s this new trending library in Android application development called compose, it was announced in Google I/O 2019 more or less three years ago. Since then, it’s started growing more and more bigger and better. Many people are saying this is the end of using XML to design application in Android Application. And many tutorials made, many courses released, many libraries developed to support the ecosystem since Google released compose first stable release.

When it first released, I thought to myself there’s probably still a long time for me to start using it in my own project. Because from the glance, it seems like a lot of work to migrate our current projects to start using compose. In addition for that, I myself don’t have any experience whatsoever with declarative UI and reading the documentation alone it seems there’s a lot new concept to learn. So I hesitant to start learning compose in its’ early days.
Looking back, there’s a time I started learning compose but the preview doesn’t work the same way as when you’re using XML. When you’re designing Android application using XML layout, the preview will automatically and seamlessly update in every changes you make in the file. On the other hand, using compose when you’re using preview you need to build your module and render your previews again every time you make changes. I immediately stop learning, because I tend to make so much revisions and preview is what keep me sane during designing the app.
This year, I thought to myself to start learning compose again. And I can say I’m hooked with it, even the preview issue I said earlier doesn’t seem to bother me that much anymore. When your changes is small like updating padding or width size, the preview will workout that automatically, but adding new component… not so much.
I started learning compose here , and let’s see what we can learn for a developer like me who’s late in the game.
This is not a tutorial to use compose, but somewhat opinionated things I learned while learning compose.
Thinking in Compose
Imperative vs Declarative UI
There’s a transition happening in mobile application development and it’s moving into declarative UI.
In not so distant past, Android Developers use XML to design the layout for their application. But this XML file can only contains what component inside the layout and the configuration like color or background or content. If later you need to dynamically change the content, like for example displaying fetched data from API/web service, you need to do it in your Kotlin file.
But because your design is in XML file and your code is in Kotlin so you need a way to refer your XML’s component inside your Kotlin code. There’s many ways you can do this, like:
findViewById, manually refer to its’ IDButterKnife, create variable using annotation with the resource ID as the parameter (deprecated)- Kotlin synthetic, generate extra code to access your view as if they are properties with the name of your resource ID (deprecated)
- ViewBinding / DataBinding, generate binding class for each XML layout in your module with direct reference to your component
Doing it like this is called Imperative UI because you’re focus on the how the data will be displayed first. And there’s issues with it, for example where possibly when your application grow more complex, you’ll possibly need to update or configure your application in multiple places.
Declarative UI solves this problem using different approach. It focus more on the data that will be displayed. It basically means it’s fine to rebuild parts of your UI from scratch instead of modifying them, modern CPU fast enough to do so.
Shift in thinking
My take on this is because the code is in Kotlin you don’t need resource ID as you do when using XML, you don’t need to refer to it after you created them. But then you might freak out and ask,
“So how do we update them later on?”.
Instead of changing or updating UI when application state changed, we describe how the UI is under specific conditions of state. Take a look of this code sample:
If you’re familiar with Kotlin, probably code like below should be intuitive for you
We have Text that display how many glass of water we had every time we click the button. So rather than update content of the Text every time the button clicked, we create a variable that contains the number of water as state and update the variable every time the Button is clicked.
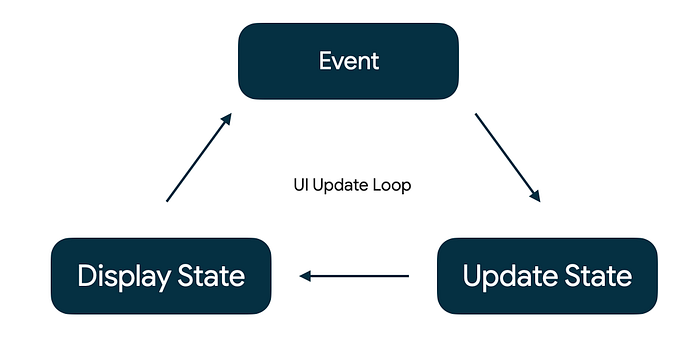
Using image below as a reference:
- The event, is when the
Buttonis clicked - Update state, is update current value of
count+1 - Display the state, is changing the content of the
Text
State determines what is shown in the UI at any particular time. You can make almost anything as a state, such as basic types (String, Boolean, Int), and even resources (String, Color, Drawable, and Dimension). And when your state value is updated, any component that used it will be updated accordingly. And that is the heart of declarative UI in Jetpack Compose.
To get use to using state in your code, it will not take very much time. Later on, all your Activity code could be inside the compose function.
Implementing it in your project
You’re probably wondering how many changes will be made when implementing/migrating current project into using Jetpack Compose. If your project already implemented clean code architecture, there’s not much changes will be made.

Because Jetpack Compose is only a library that describe how your UI work and displayed, only your presentation layer will have to change. The rest of your code like fetching data from API, storing and manipulating data in local database, it will work as intended with Jetpack Compose.
You can even gradually migrate your code to adopt Compose because Compose and Android View work well together. More about that here.
What does it like designing in compose
Displaying list data
To grasp how easy it is to use compose, let’s take a sample if we’re going to display list of data. In XML era, we’re probably going to use RecyclerView . And the steps might be as follows:
- Create Adapter and ViewHolder with array/list to store data inside the
RecyclerView - Add
RecyclerViewto the XML layout - Setup
RecyclerViewwith Layout Manager and add the adapter to it - (optional) if your data not yet ready when the
RecyclerViewinitialized, you’ll have to add the data to the list within the adapter to update it
There’s a lot of steps need to be done just to display list of data. But using compose, because all the layout, configuration, and state are stored inside the composable function. So you don’t have to do that much stuff anymore, let’s take a look of this example:
Using compose, what you can do is:
- No need for Layout Manager, you can define how list will be displayed by built-in layout. For example for displaying vertically use
LazyColumnand for displaying horizontally useLazyRow - Create a new compose function and add the data object as the parameter, any action like click can be configured inside it
And that’s it, no adapter or viewHolder needed. As you can see, using compose will actually help you write less code and you can work with less file. This reason alone make some developers eager to learn more about compose.
ConstraintLayout
I’m a strong believer that you’ll make better design using ConstraintLayout . Because if you’re thinking about responsive UI, using ConstraintLayout actually make sense.
At first I thought it would be difficult implementing ConstraintLayoutusing compose because we’re not using resource ID to add constraint. There’s ConstraintLayout implementation you can use by adding this to your gradle configuration:
First thing first, instead of using resource ID like designing in XML ConstraintLayout in compose using reference that you can create using createRefs() or createRefFor() . Let’s take a look at example:
will result UI like this:
Navigating the application
When starting new Android project, there’s question to answer like what architecture will we use to develop it.
- Does using multiple
Activitystill relevant? - Do we use
Fragmentback stack manually? - Or we implement single
Activityarchitecture using Jetpack navigation?
Nowadays, people goes toward using Navigation Component and use single Activity as container, and list of fragments as the page of the application.
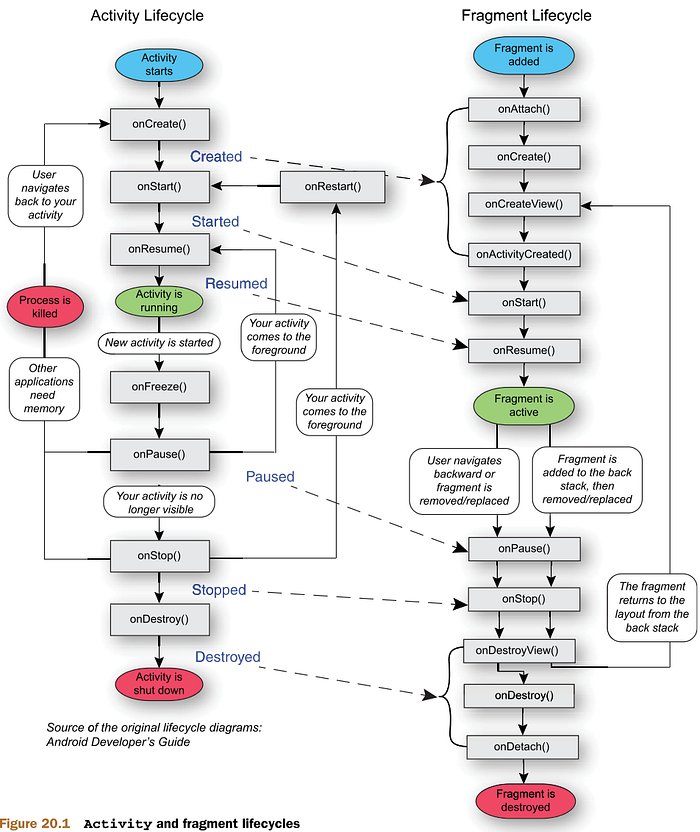
There’s some issues I’m facing when using navigation Component, for example synchronizing the lifecycle of the Activity and the Fragment because they have their own lifecycle. Before using lifecycle observer, it’s quite hard to define which function run at which lifecycle when using Fragment.
Using the Navigation for compose is not the same as using Navigation Component. The difference I notice is as follows:
- In navigation for compose, single
Activitydoesn’t achieve by using list of fragments but you use the compose functions as destination - Navigation graph is not built using XML, but in Kotlin inside the compose function
Let’s take a look for example:
Conclusion

Twitter announces that they will develop more features using Jetpack Compose. So what about us? Should we do it too?
My overall experience so far with Compose is good, and I do believe it’s revolutionary technology. Using it will change your way of thinking when developing application, and it reduce your code too which is nice.
Developing more code in one language is a good thing too, I did say you can can create NavGraph using navigation for Compose, but you actually can already do that using Navigation Component. The plus side is using Compose, not only you can design your application using Kotlin, but your resources like styling, colors, typography, and even drawable (in Compose called ImageVector) can be written in Kotlin too.