Custom Font Magic in Compose Multiplatform: Unlock Your Creativity! 🌟🎨✨
Not so straightforward though.

if you are using Compose Multiplatform 1.6.0 or above read this article instead https://proandroiddev.com/how-to-use-resources-in-compose-multiplatform-77a6552b505d
Custom fonts breathe life into an app, as each one reflects its unique brand identity. Setting up custom fonts on Android and iOS is relatively simple, but in Compose Multiplatform, it can be more challenging. Let’s simplify the process and make it easier to achieve a seamless brand experience.
Step 1:
After adding all Compose Multiplatform dependencies, you can enable resource support by adding the following experimental library dependency. It requires you to opt in for usage. 🛠️🌟
(Note: Please check the latest documentation for any updates or changes related to resource support in Compose Multiplatform.)
 @OptIn(org.jetbrains.compose.ExperimentalComposeLibrary::class)
                implementation(compose.components.resources)
Step 2:
After syncing, head to the shared/Common Main directory and create a resource folder. Inside this folder, create another folder named font. Now, simply copy and paste your desired fonts into this newly created font folder.

Step 3:
Now normally in Android, you would’ve done it like this,
private val Nunito = FontFamily(
    Font(R.font.nunito_regular),
    Font(R.font.nunito_semibold),
    Font(R.font.nunito_bold, weight = FontWeight.ExtraBold)
)

val NunitoTypography = Typography(
    h1 = TextStyle(
        fontFamily = Nunito,
        fontWeight = FontWeight.SemiBold,
        fontSize = 52.sp,
    ),
    h2 = TextStyle(fontFamily = Nunito, fontWeight = FontWeight.Bold, fontSize = 24.sp),
    h3 = TextStyle(
        fontFamily = Nunito,
        fontWeight = FontWeight.Bold,
        fontSize = 18.sp,
    ),
    h4 = TextStyle(
        fontFamily = Nunito,
        fontWeight = FontWeight.SemiBold,
        fontSize = 16.sp,
    ),
    h5 = TextStyle(fontFamily = Nunito, fontWeight = FontWeight.Bold, fontSize = 14.sp),
    h6 = TextStyle(
        fontFamily = Nunito,
        fontWeight = FontWeight.SemiBold,
        fontSize = 12.sp,
    ),
    subtitle1 = TextStyle(
        fontFamily = Nunito,
        fontWeight = FontWeight.W500,
        fontSize = 16.sp,
    ),
    subtitle2 = TextStyle(
        fontFamily = Nunito,
        fontWeight = FontWeight.W400,
        fontSize = 14.sp,
    ),
    body1 = TextStyle(fontFamily = Nunito, fontWeight = FontWeight.Normal, fontSize = 14.sp),
    body2 = TextStyle(fontFamily = Nunito, fontSize = 10.sp),
    button = TextStyle(
        fontFamily = Nunito, fontWeight = FontWeight.W400, fontSize = 15.sp, color = OnPrimary
    ),
    caption = TextStyle(fontFamily = Nunito, fontWeight = FontWeight.Normal, fontSize = 8.sp),
    overline = TextStyle(fontFamily = Nunito, fontWeight = FontWeight.W400, fontSize = 12.sp)
)
but this does not work in Compose multiplatform :(
Step 4:
let's do some expect actual magic.
@Composable
expect fun font(name: String, res: String, weight: FontWeight, style: FontStyle): Font
In the Android Main module, we’ll create the actual implementation for custom fonts. It’s straightforward; we get the font resource using the context and return a FontRequest. With this implementation, you can seamlessly use your custom font throughout your Android application.
@Composable
actual fun font(name: String, res: String, weight: FontWeight, style: FontStyle): Font {
    val context = LocalContext.current
    val id = context.resources.getIdentifier(res, "font", context.packageName)
    return Font(id, weight, style)
}
let's do the Ios part,
private val cache: MutableMap<String, Font> = mutableMapOf()
@OptIn(ExperimentalResourceApi::class)
@Composable
actual fun font(name: String, res: String, weight: FontWeight, style: FontStyle): Font {
    return cache.getOrPut(res) {
        val byteArray = runBlocking {
            resource("font/$res.ttf").readBytes()
        }
        androidx.compose.ui.text.platform.Font(res, byteArray, weight, style)
    }
}
This function speeds up the usage of custom fonts by caching them. If the same font is requested again, it’s retrieved from the cache instead of loading it from scratch. For new fonts, it loads them from resources and saves them in the cache for future use. This optimization enhances the app’s performance and creates a smoother user interface when dealing with various font styles and weights.
if you also have compose desktop then add this to the desktop main,
@Composable
actual fun font(name: String, res: String, weight: FontWeight, style: FontStyle): Font =
       androidx.compose.ui.text.platform.Font("font/$res.ttf", weight, style)
and now you are all set to use custom fonts in your compose multiplatform app.
Step 5:
Now you can define your custom typography for your theme like this.
   val nunitoRegular = FontFamily(
            font(
                "Nunito", "nunito_regular", FontWeight.Normal, FontStyle.Normal
            )
        )

        val nunitoSemiBold = FontFamily(
            font(
                "Nunito", "nunito_semibold", FontWeight.Normal, FontStyle.Normal
            )
        )
        val nunitoBold = FontFamily(
            font(
                "Nunito", "nunito_bold", FontWeight.Normal, FontStyle.Normal
            )
        )
As you can see we are now using the expect function that we created font() and using it to load the font and create a font family object. We can then use it to define custom typography. This can then be used inside your material theme.
val typo = Typography(
            h1 = TextStyle(
                fontFamily = nunitoBold,
                fontWeight = FontWeight.Bold,
                fontSize = 52.sp,
            ),
            h2 = TextStyle(fontFamily = nunitoBold, fontWeight = FontWeight.Bold, fontSize = 24.sp),
            h3 = TextStyle(
                fontFamily = nunitoBold,
                fontWeight = FontWeight.Bold,
                fontSize = 18.sp,
            ),
            h4 = TextStyle(
                fontFamily = nunitoBold,
                fontWeight = FontWeight.Bold,
                fontSize = 16.sp,
            ),
            h5 = TextStyle(fontFamily = nunitoBold, fontWeight = FontWeight.Bold, fontSize = 14.sp),
            h6 = TextStyle(
                fontFamily = nunitoSemiBold,
                fontWeight = FontWeight.SemiBold,
                fontSize = 12.sp,
            ),
            subtitle1 = TextStyle(
                fontFamily = nunitoSemiBold,
                fontWeight = FontWeight.SemiBold,
                fontSize = 16.sp,
            ),
            subtitle2 = TextStyle(
                fontFamily = nunitoRegular,
                fontWeight = FontWeight.Normal,
                fontSize = 14.sp,
            ),
            body1 = TextStyle(
                fontFamily = nunitoRegular, fontWeight = FontWeight.Normal, fontSize = 14.sp
            ),
            body2 = TextStyle(fontFamily = nunitoRegular, fontSize = 10.sp),
            button = TextStyle(
                fontFamily = nunitoRegular,
                fontWeight = FontWeight.Normal,
                fontSize = 15.sp,
                color = OnPrimary
            ),
            caption = TextStyle(
                fontFamily = nunitoRegular, fontWeight = FontWeight.Normal, fontSize = 8.sp
            ),
            overline = TextStyle(
                fontFamily = nunitoRegular, fontWeight = FontWeight.Normal, fontSize = 12.sp
            )
        )
Step 6:
Step 6 is no longer requried for iOS. See here -> https://github.com/JetBrains/compose-multiplatform/pull/3340Add this line to your cocoa pods.
extraSpecAttributes["resources"] = "['src/commonMain/resources/**', 'src/iosMain/resources/**']"
Add these to the android block in build.gradle of your shared module.
    sourceSets["main"].manifest.srcFile("src/androidMain/AndroidManifest.xml")
    sourceSets["main"].res.srcDirs("src/androidMain/res", "src/commonMain/resources")
Final Step:
Now we can use the typography in our material theme.
MaterialTheme(
colors = LightColorPalette, typography = typography, shapes = Shapes, content = content
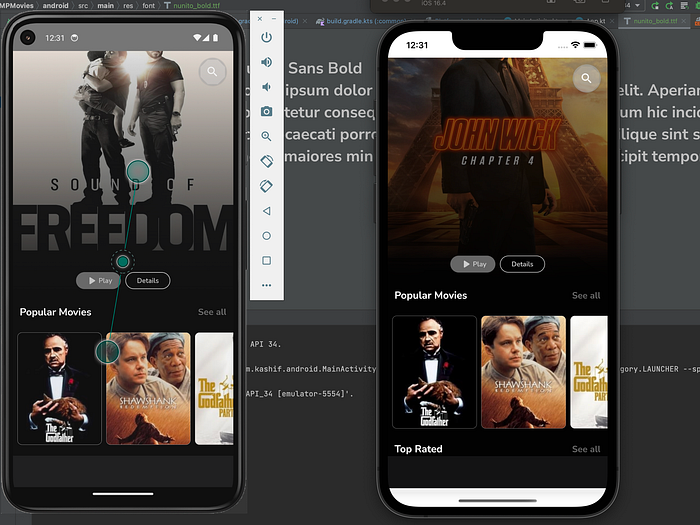
)Result:
You may encounter in your ios app resource not found exception, you just need to do a pod install and it will be fixed.
That will be all for today. Happy coding ❤ ❤ ❤
I am open to work, connect with me on LinkedIn:
https://www.linkedin.com/in/kashif-mehmood-km/
Implementation can be found here:
Inspired by this sample
let's connect on Twitter