Configuring Retrofit 2 Client in Android
Setting up Retrofit 2 and running it in Android is easy, but at times it gets trickier when you work in production environment where you’ll be working with backends that use Authorisation Headers, Basic Authentication & SSL enabled API’s. I am a freelance android developer and I’ll be sharing few insights on how to setup these based on my experience.
Logging Interceptor
Retrofit 1 had an inbuilt logging feature which was removed in Retrofit 2 initially, but upon request logging interceptor was added in release 2.6.0.
To add logging interceptor :
- Add
compile 'com.squareup.okhttp3:logging-interceptor:3.8.0'to your app levelbuild.gradlefile. - In your
RetroClientclass, create a logging interceptor class object, set the log level and add it to theOkHttpClient.Builderclass object.
Authorization Header
Adding HTTP request headers is a good practice to add information for API requests. A common example is authorization using the Authorization header field which is where we mostly set the API token.
To add Authorization Header :
- Create a new Interceptor with request headers.
- Add that interceptor to the
OkHttpClient.Builderclass object.
Basic Authentication
Basic authentication is a simple authentication scheme built into the HTTP protocol. The client sends HTTP requests with the Authorization header that contains the word Basic word followed by a space and a base64-encoded string username:password. For example, to authorize as demo / p@55w0rd the client would send:Authorization: Basic ZGVtbzpwQDU1dzByZA==
To add Basic Auth :
- Replace the user defined
Auth Tokenfrom the Authorization header with theAuth Tokentoken generated by the OkHttp3Credentialsclass using Username and Password.
SSL Configuration
By default, Retrofit cannot connect with API’s that are protected with SSL and so we need to configure our Retrofit 2 client.
To add the SSL certificate to Retrofit 2 client:
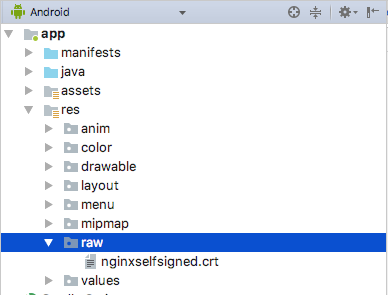
- Add the
.crtfile to therawfolder inside Resources.
2. Create a function that generate the SSL certificate from the .crt file and returns a SSLContext object.
3. Set SSLSocketFactory to OkHttpClient.Builder class using the SSLContext and also set the host name verifier.
Bonus: Loading images from SSL enabled links through Picasso
Now that we have configured SSL, we all know that the API’s are usually built in a way that it returns the Image URL’s of stored images and not the images itself. But, since the Base URL is SSL enabled, there is no way that the default Picasso library can load an image from it without being configured.
To load images from SSL enabled links :
- Just add the below class to your project.
2. Now, instead of calling the default Picasso.with() use PicassoTrustAll.getInstance()
Voilà! You just got an Upgrade.
Thanks for reading through 🙌🏼. If you found this post useful, please applaud using the 👏 button and share it through your circles.
I am a Freelance Android Developer with a passion to develop Android applications having challenging features & design concepts. I have built quality, intuitive & appealing mobile application in my 2+ years of industry experience. Need an Android version of your iOS/Web app? Want to see your design/vision come to life? I am your guy, Get in touch with me.