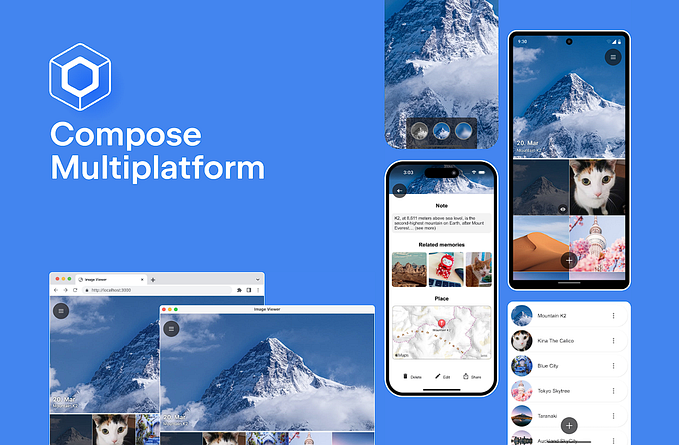
Compose MultiPlatform shared UI with KMP (Part 1)

Recently, the Android development has been quite modern .Massive XML layouts has been turned off , these are the days for Jetpack Compose, Android’s modern, fully declarative UI toolkit. With its powerful and intuitive Kotlin-based syntax, Compose simplified UI development and also opened doors to a future of more concise, reactive, and dynamic mobile applications.
Jetpack Compose got wide adoption and recognition from developers. At the same time, the demand for cross-platform solutions was growing as well. Thus, JetBrains, the powerhouse behind Kotlin, together with Google went on a mission to expand the Compose experience to more platforms, and Compose Multiplatform was born.
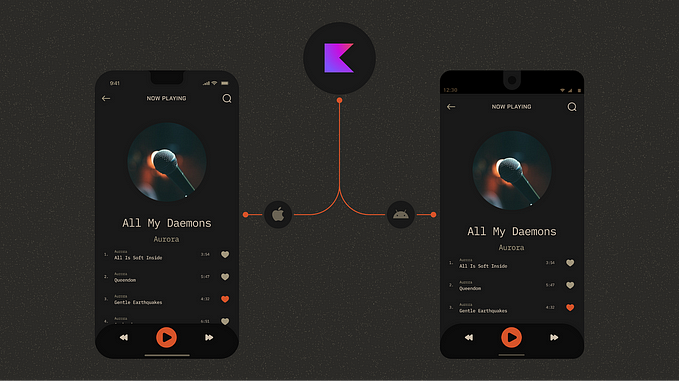
Here i am trying to explain you how Compose Multiplatform work with shared UI, With this UI framework, you can push the code-sharing capabilities of Kotlin Multiplatform beyond application logic. You can implement the user interface once and then use it for all the platforms you target — iOS, Android, desktop
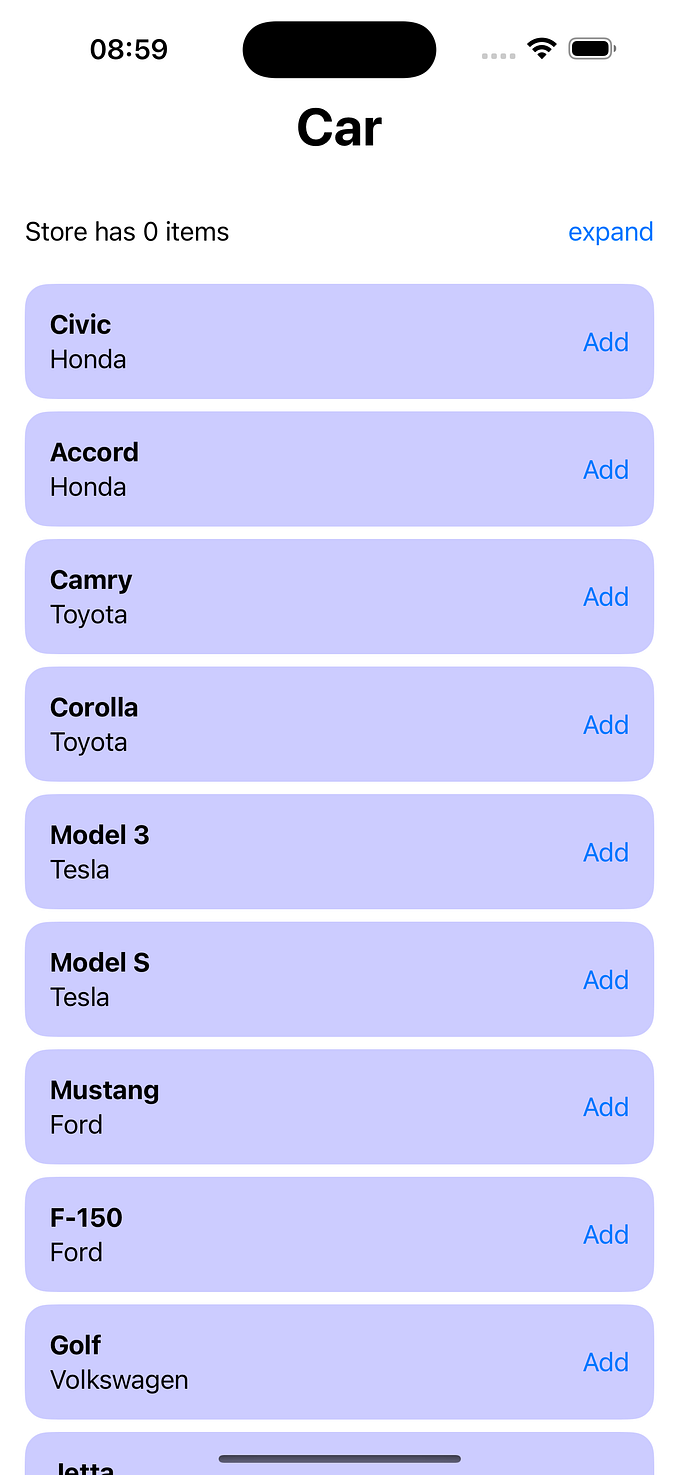
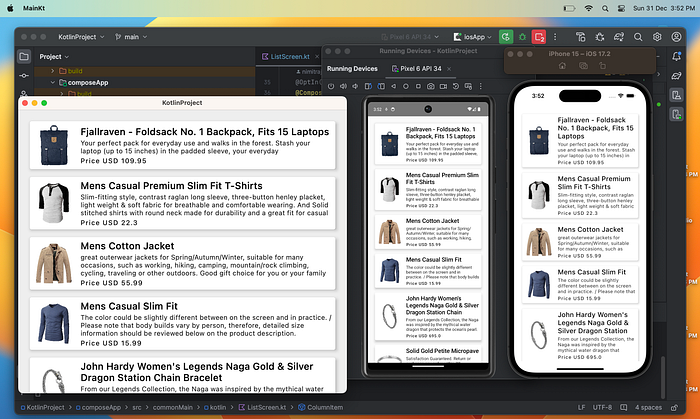
In this tutorial, i have build a sample application of lazy colums with custom data that runs on Android, iOS, and Desktop(for me its for Mac). To create a user interface, you will use the Compose Multiplatform framework and learn about its basics: composable functions, themes, layouts, events, and modifiers.
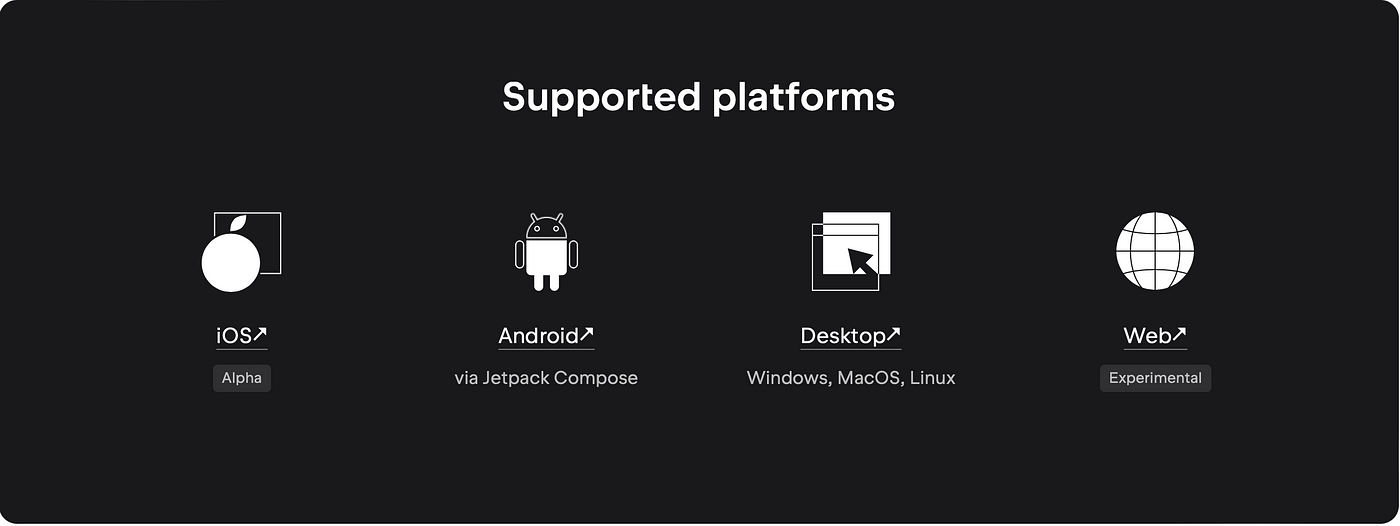
Supported platforms are
Now the question is what is the difference between Kotlin Multiplatform & Compose Multiplatform ?
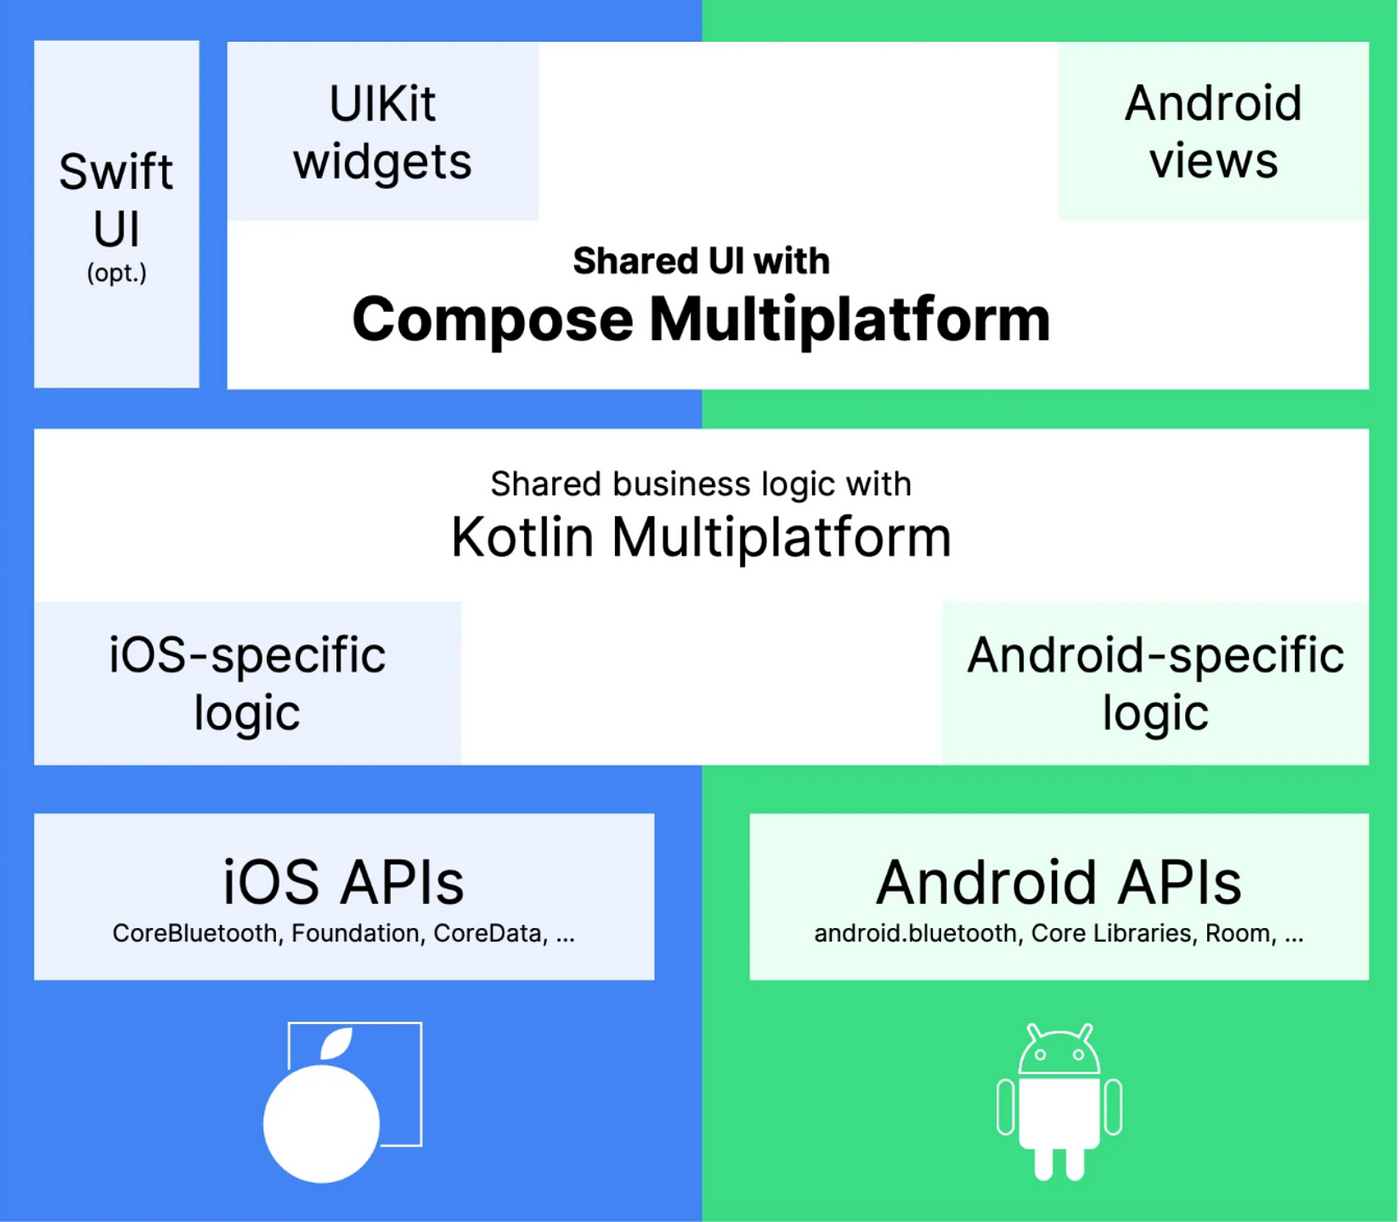
Kotlin Multiplatform is for sharing business logic between platforms, but it has one big drawback — developers still need to implement UI with native tools like Jetpack Compose (Android) and SwiftUI(iOS).
Here Compose Multiplatform enters the stage to fill the gap KMP had this whole time, completing the Kotlin experience. By combining Compose and KMP you can achieve your codebase to consist of Kotlin for 80–95% depending on the project’s complexity. For me, as an Android developer, that sounds pretty exciting.
in short the difference is
Kotlin Multiplatform- only Shared business logic + seperate UI for Android , iOS
Compose Multiplatform — Shared business logic + shared UI between Android, iOS
so which is better? Obviously Compose Multiplatform
Dive into Implementation
First of all, your working machine for cross-platform development. Shortly, you will need Android Studio with installed KMP plugin, Xcode and CocoaPods dependency manager
The good news is that you don’t even need to spend time for a proper KMP + Compose project setup, JetBrains has a convenient template with step-by-step explanations of what’s happening in this template, you can select the platform into this template & download it, it will create a sample project setup for you
Let me Explain how project structure is look like
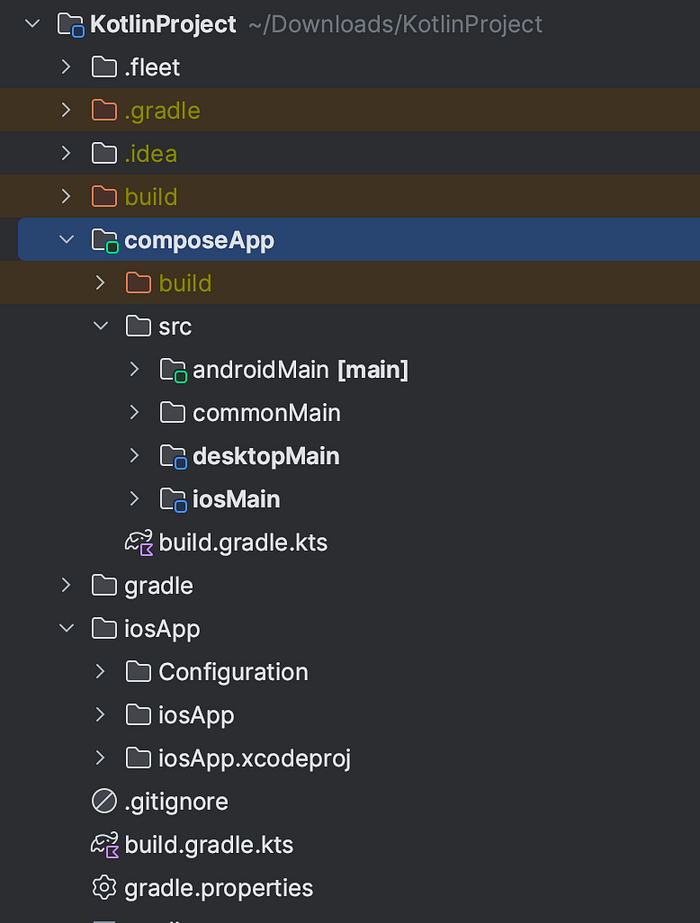
- composeApp- it contains platform specific folder that contains entry point & shared ui & business logic
- commonMain — in this module we will keep all shared Compose UI and business logic
- androidMain — Kotlin module, the entry point for Android application, contains platform-specific classes, like Application and Activity, as well as additional dependencies if required
- desktopMain — Kotlin module, the entry point for Desktop application, contains platform-specific classes, like Window class
- iosMain — Xcode project with platform-specific configurations and classes. During build time commonMain module gets bundled into the iOS project as a CocoaPod dependency.
Lets see How you can define the dependency for each platform & common dependency of platforms
Inside Gradle folder we have version catalog file
[versions]
agp = "8.1.4"
android-compileSdk = "34"
android-minSdk = "24"
android-targetSdk = "34"
androidx-activityCompose = "1.8.2"
androidx-appcompat = "1.6.1"
androidx-constraintlayout = "2.1.4"
androidx-core-ktx = "1.12.0"
androidx-espresso-core = "3.5.1"
androidx-material = "1.10.0"
androidx-test-junit = "1.1.5"
compose = "1.5.4"
compose-compiler = "1.5.6"
compose-plugin = "1.5.11"
junit = "4.13.2"
kotlin = "1.9.21"
ktor = "2.3.7"
coroutines = "1.7.3"

[libraries]
androidx-activity-compose = { module = "androidx.activity:activity-compose", version.ref = "androidx-activityCompose" }
compose-ui-tooling = { module = "androidx.compose.ui:ui-tooling", version.ref = "compose" }
compose-ui-tooling-preview = { module = "androidx.compose.ui:ui-tooling-preview", version.ref = "compose" }
ktor-client-core = { module = "io.ktor:ktor-client-core", version.ref = "ktor" }
ktor-client-okhttp = { module = "io.ktor:ktor-client-okhttp", version.ref = "ktor" }
ktor-client-darwin = { module = "io.ktor:ktor-client-darwin", version.ref = "ktor" }
ktor-client-cio= {module ="io.ktor:ktor-client-cio", version.ref = "ktor"}
kotlin-serialization = {module = "io.ktor:ktor-serialization-kotlinx-json", version.ref="ktor"}
kotlinx-coroutines-core = { module = "org.jetbrains.kotlinx:kotlinx-coroutines-core", version.ref = "coroutines" }
kotlinx-coroutines-android = { module = "org.jetbrains.kotlinx:kotlinx-coroutines-android", version.ref = "coroutines" }

[plugins]
androidApplication = { id = "com.android.application", version.ref = "agp" }
androidLibrary = { id = "com.android.library", version.ref = "agp" }
jetbrainsCompose = { id = "org.jetbrains.compose", version.ref = "compose-plugin" }
kotlinMultiplatform = { id = "org.jetbrains.kotlin.multiplatform", version.ref = "kotlin" }
kotlinSerialization = { id = "org.jetbrains.kotlin.plugin.serialization", version.ref = "kotlin" }- [Version]- version name with number
- [libraries]- library name with module & version number[Version]
- [Plugins]- plugins name with id & version number[Version]
Now we can use libraries like this into build.gradle
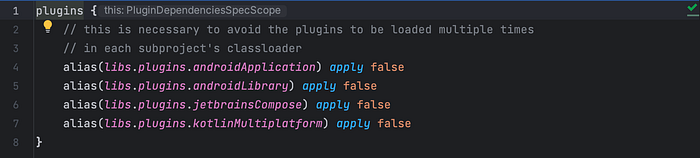
Plugins for the project level build.gradle
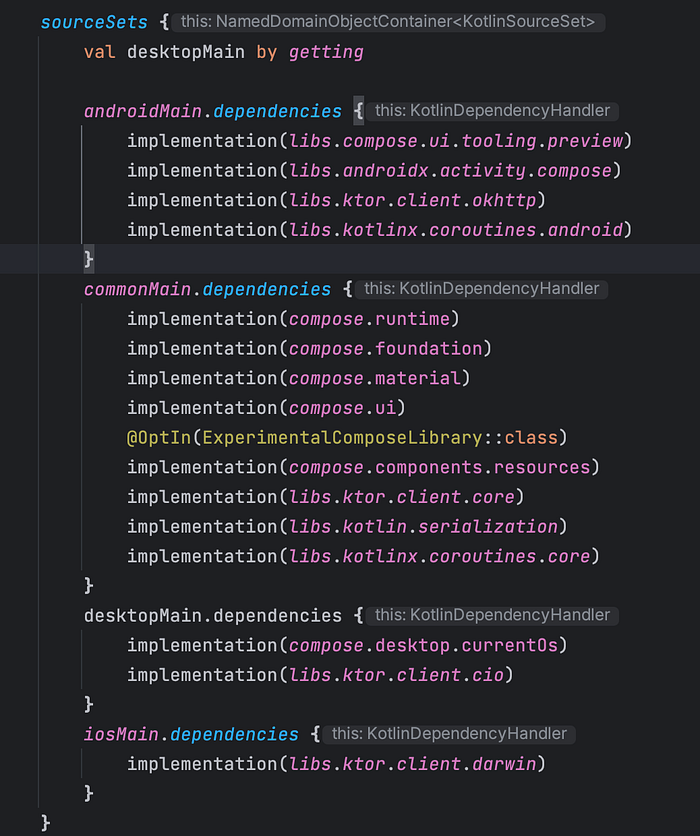
Now lets quick review about the how dependencies are defined
 sourceSets {
        val desktopMain by getting

        androidMain.dependencies {
            implementation(libs.compose.ui.tooling.preview)
            implementation(libs.androidx.activity.compose)
            implementation(libs.ktor.client.okhttp)
            implementation(libs.kotlinx.coroutines.android)
        }
        commonMain.dependencies {
            implementation(compose.runtime)
            implementation(compose.foundation)
            implementation(compose.material)
            implementation(compose.ui)
            @OptIn(ExperimentalComposeLibrary::class)
            implementation(compose.components.resources)
            implementation(libs.ktor.client.core)
            implementation(libs.kotlin.serialization)
            implementation(libs.kotlinx.coroutines.core)
        }
        desktopMain.dependencies {
            implementation(compose.desktop.currentOs)
            implementation(libs.ktor.client.cio)
        }
        iosMain.dependencies {
            implementation(libs.ktor.client.darwin)
        }
}- androidMain.dependencies — for Android specific dependency
- iosMain.dependencies — for iOS specific dependency
- desktopMain.dependencies- for desktop specific dependency
- commonMain.dependencies — for common dependency between platforms
All the platforms have an entry Point App.kt
@Composable
fun App() {
    MaterialTheme {
        Column(Modifier.fillMaxWidth(), horizontalAlignment = Alignment.CenterHorizontally) {
            ListScreen(Repository.getDataList())
        }
    }
}
@Composable
fun ListScreen(list: List<Products>)
{
LazyColumn(modifier = Modifier.fillMaxWidth(), contentPadding = PaddingValues(16.dp)) {
items(list) { data ->
ColumnItem(data.title, data.description, data.price.toString(), data.image)
}
}
}
@OptIn(ExperimentalResourceApi::class)
@Composable
fun ColumnItem(name: String, description: String, price:String, image: String) {
Card(
modifier = Modifier.padding(8.dp)
.fillMaxWidth()
.wrapContentHeight(),
shape = MaterialTheme.shapes.medium,
elevation = 5.dp,
backgroundColor = MaterialTheme.colors.surface
) {
Row(
verticalAlignment = Alignment.CenterVertically,
) {
Image(
painter = painterResource(res = "compose-multiplatform.xml"),
contentDescription = null,
modifier = Modifier.size(100.dp)
.padding(8.dp),
contentScale = ContentScale.Fit,
)
Column(Modifier.padding(4.dp)) {
Text(
modifier = Modifier.padding(2.dp),
text = name,
maxLines = 3,
style = MaterialTheme.typography.h6,
color = MaterialTheme.colors.onSurface,
)
Text(
modifier = Modifier.padding(2.dp),
text = description,
maxLines = 3,
style = MaterialTheme.typography.body2,
)
Text(
modifier = Modifier.padding(2.dp),
text = "Price USD $price",
style = MaterialTheme.typography.button,
)
}
}
}
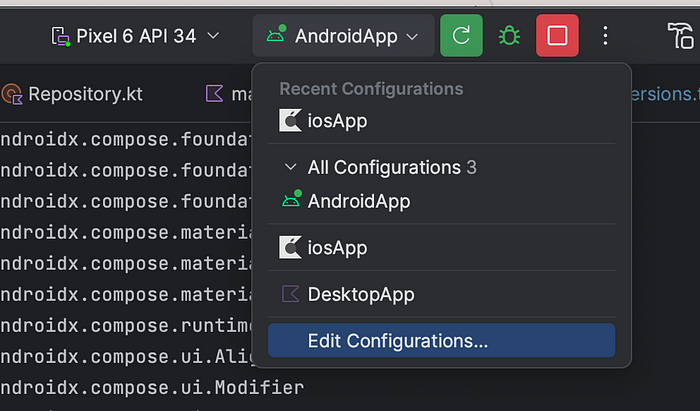
}Lets select the platform from top & run the App, Thats it !!
Summary
- We learned compose multiplatform environment setup
- We learned how project structure is being used
- We learned how to declare common dependencies & platform specific dependencies
- We learned that how to shared ui works between platforms
- I will cover how Ktor will work for Network request for Multiplatform in the upcoming blog!! Thank you !!
You can chekout my Github Repository !!
Please let me know your valuable inputs in the comments.
I would appreciate Claps if you find this article useful.