Biometric Authentication with backend verification

One way to apply server-side authentication with biometrics authentication method is to use CRAM (Challenge Response Authentication Mechanism). It is a zero-knowledge authentication mechanism in which the client proves his identity without giving any information out to the hacker.
In this technique, the client asks the server for a challenge. The client applies a (mathematical) algorithm on this challenge and sends the response to the server. The server verifies if challenge was answered correctly.
Example
Assume the server sends a challenge “alice12” to the client.
The client responds with “21ecila” (which is the reverse of the challenge).
The server verifies if the response is correct. Of course, client and server have to share the same algorithm. In the real world this (mathematical) algorithm would be much more complex.

Biometric authentication
For our biometric authentication we are going to use asymmetric cryptography. This cryptographic system uses pairs of public keys which may be disseminated widely, and private keys which are known only to the owner. One of the properties of this system is that a sender can use its private key to sign a message and this signature can be verified by anyone who has access to the sender’s public key. This verification proves that the sender had access to the private key, and therefore the sender identifies its identity. This system also that the message has not been tampered with, as a signature is mathematically bound to the message it originally was made with, and verification will fail for practically any other message, no matter how similar to the original message.
For our biometric authentication we define two steps, enrolment and authentication.
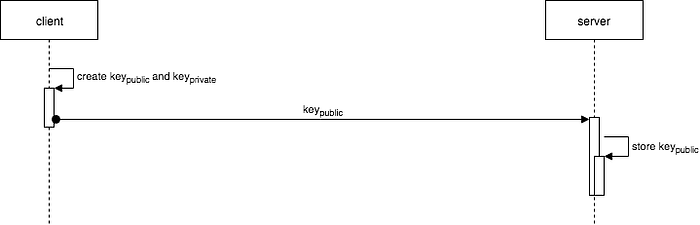
Enrolment
This step happens when a user turns on the biometric authentication in the app. During this step we create a public and private key pair and store them in the phone’s secure, usually Hardware-backed, keystore. We also tell the OS to only open this keystore if the user identifies itself.
Then we send the public key to the server. One way to do this, is to get the encode byteArray of the public key, encode this byteArray with base64 encoding and convert it into a PEM format. These extension function in kotlin can be used to convert a public key to a PEM format. This format can be sent as a string to the server.
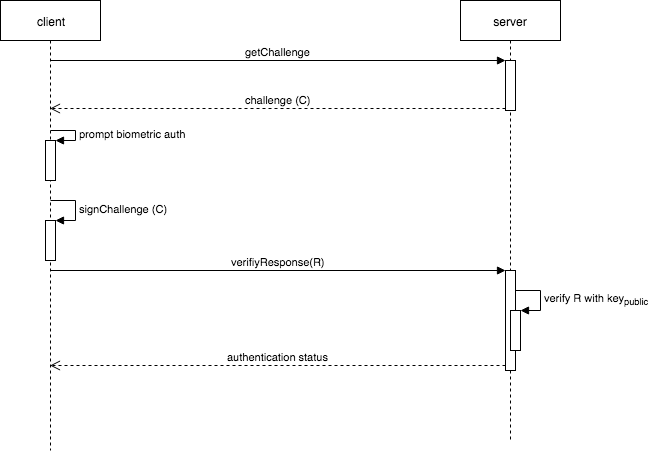
Authentication
For this step, first we ask the server to send us a challenge C. Then the app prompt the user to authenticate itself using biometric authentication (Fingerprint). If the authentication is successful, we will get access to the keystore, which contains our generated public key and private key. Remember that we can’t use the private key directly. Instead, we have to use CryptoObject, which is wrapper class for the crypto objects supported by BiometricPrompt.
Once we have access to the keystore, we can use the CryptoObject to sign the challenge C. To avoid replay, we will also append a nonce to the challenge and optionally we can also append salt, which is known by the client and the server. A nonce is often a random or pseudo-random number issued in an authentication protocol to ensure that old communications cannot be reused in replay attacks.
If you are willing to use JWT, please be aware that most of the third party libraries are expecting a private key for signing and wouldn’t work with a CryptoObject. With the BioAuth library, which will be demoed below, you can also use the JWT implementation.
https://bintray.com/mbsobat/maven/bioauth
BioAuth library
This library makes it easier to authenticate using biometrics with CRAM. To demo this library, we are going to use a sample app. This app contains 2 screen
- login screen
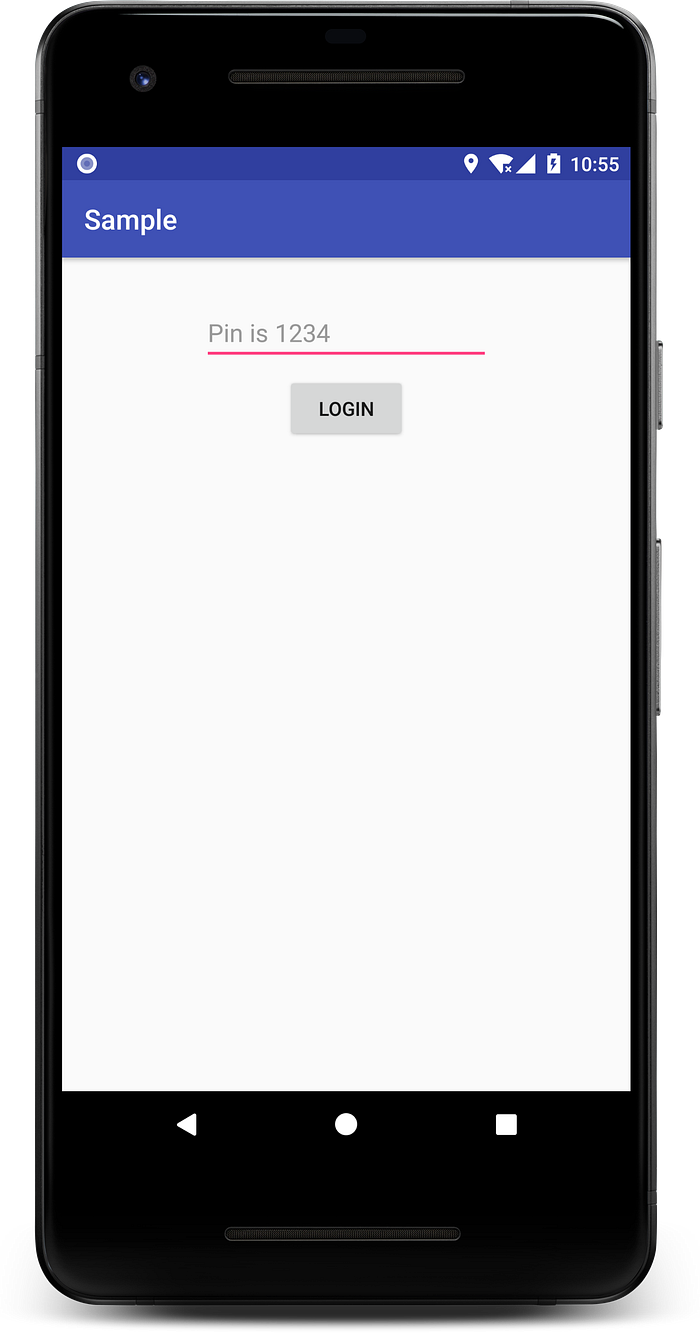
2. LoggingIn screen
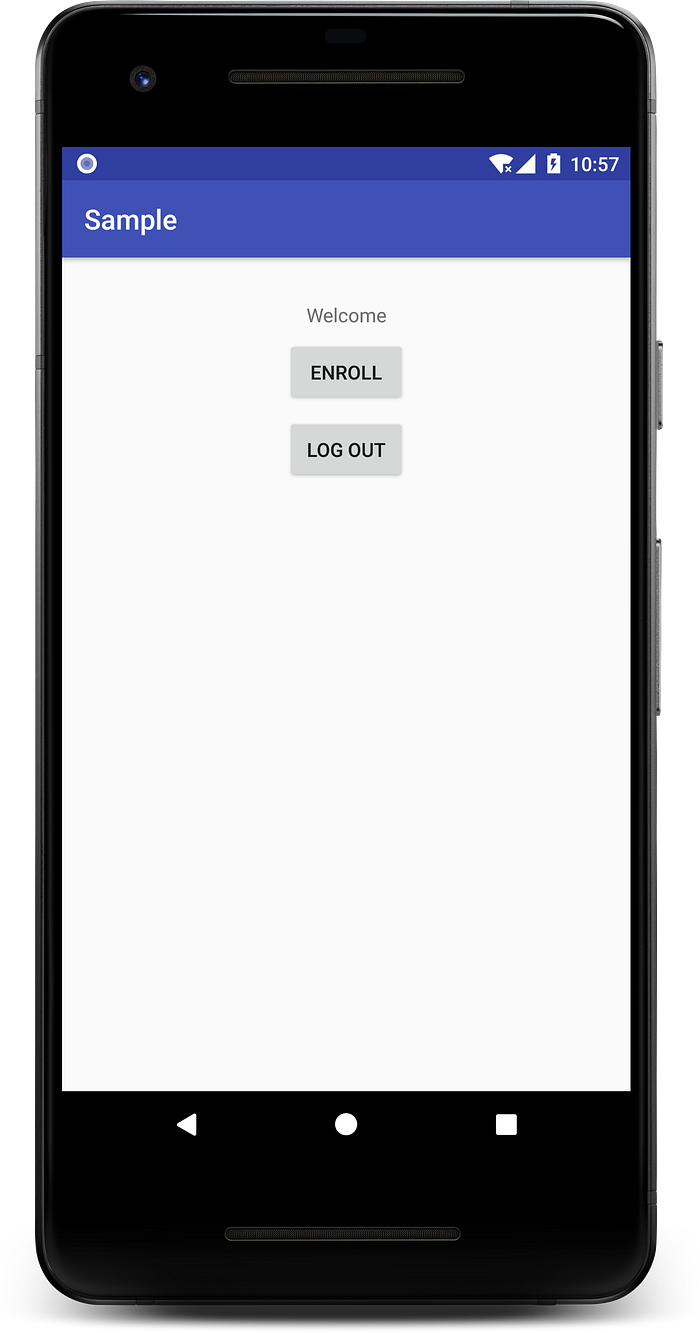
Once you are logged in (using a pincode), you can enroll the fingerprint. Next time when you want to login, you can use your fingerprint to authenticate.

This app mocks the backend instead of using a real backend. For the sake of simplicity, we are not focusing on software architecture. In the real world app the calls to backend need to be done in a background thread or coroutine.
BioAuthManager
This class is responsible for almost everything regarding the biometric authentication. Use BioAuthManager.Builder(context, BioAuthSettings).build() to create a default instance of BioAuthManager.
val manager = BioAuthManager.Builder(context, MyBioAuthSettings(context)) .build()
This will use the default configuration with
- Elliptic Curve Cryptography with 256-bit curve
- Digests algorithms SHA256
- Keystore name: bioauthkey
You can also use the builder class’ optional methods to configure the manager.
Beside the context, the builder also expects BioAuthSettings. It’s responsible for storing and retrieving settings in and from (local) database.
Enrollment
Before giving the option to the user to enroll fingerprint option, first we have to check if
- The device has a biometric sensor
- The device has registered fingerprints
- The device’s SDK is supported
BioAuthManger provides methods to check these conditions.
Once the user clicks on enrol button, we can call the BioAuthManager.enroll() method, which returns a public key. Then we can send this public key to our backend.
Authentication
If biometric authentication is available on the device (Again we can use BioAuthManager to check) and it is enabled then we can use BioAuthManager.startListening method to start listener to the authentication callbacks.
After onAuthenticationSucceeded callback is called, we:
- request a challenge from our backend, and append a nonce and if optionally we can also append salt
- call BioAuthManager.signChallenge method to sign the challenge using the private key
- send the signed message and the generated nonce to the backend for verification
Using JWT
The provided JWT implementation works fine with auth0/java-jwt library. You can use either ES512 or ES256 format.
Use the companion method to create an instance of JwtObject and pass this instance to bioAuthManager.signChallenge method to create a signed JWT message. Everything else remains the same.
The server
This is an example implementation. For the verification, the first step is to load the public key.
You can also use bouncycastle/spongycastle library. Once the public key is loaded, you can verify if the signed message was signed using the private key.

