Automating Android library release using Github Actions
Guide to automate Github release and Bintray upload of android libraries using Github actions.

Many of us has developed open-source libraries and published it to JCenter/Bintray. For every new version we used to create a release in Github manually by going to the releases tab. For uploading to Bintray we used the bintray-gradle plugin, when a new release is created we manually run the command gradlew bintrayUpload in terminal.
Quite boring work right? What if we can automate this workflow? Let’s see how we can achieve this by using Github Actions.
GitHub Actions help you automate your software development workflows in the same place you store code and collaborate on pull requests and issues. You can write individual tasks, called actions, and combine them to create a custom workflow. Workflows are custom automated processes that you can set up in your repository to build, test, package, release, or deploy any code project on GitHub.
Recently I have integrated Github Actions to my open-source library RoomInspector and automated the release and publish workflow. When a new tag is pushed to master branch, then a new release will be created automatically in Github and will be published to Bintray.
You can check Room-Inspector on my github repository :
In this article I will explain how to automate your libraries release workflow using Github actions. At the end of this article, you will get a brief idea about Github actions and will be able to automate the your workflow.
Let’s Start…
We have 2 flows to automate : one for GitHub release and one for Bintray publishing.
Create a workflow .yml file named release.yml in your .github/workflows directory (under projects root directory). So the final path of the file will be {projectdir}/.github/workflows/release.yml or you can do this simply by going to the Actions tab on your Github repository and clicking on setup/new workflow.
I recommend you to check the workflow syntax for github actions in the official documentation.
Automating Github release
Copy paste below lines in to the workflow file.
Now let’s see what all these mean.
name is the full name of your workflow, which will be displayed in the list of workflows under the actions tab.
on defines on what event workflow will be triggered. In our case we want to trigger the workflow when a new tag ( with ‘v’ as prefix ) is pushed to the master branch.
A workflow run is made up of one or more jobs. Jobs run in parallel by default. To run jobs sequentially, you can define dependencies on other jobs using the jobs.<job_id>.needs keyword. Each job must have an id to associate with the job. name - name of the job displayed on GitHub.
Each job runs in an environment specified by runs-on. The machine can be either a GitHub-hosted runner, or a self-hosted runner.
A job contains a sequence of tasks called steps. Here we defined 3 steps.
In first step, the checkout action checks-out your repository under $GITHUB_WORKSPACE, so the workflow can access it.
In the second step, we are creating an environment variable RELEASE_NAME by removing the ‘v’ from the tag.
Third step uses create a release action which wraps the GitHub Release API, specifically the Create a Release endpoint, to allow you to leverage GitHub Actions to create releases.
tag_name: The name of the tag for this releaserelease_name: The name of the releasebody: Text describing the contents of the release. Optional, and not needed if usingbody_path.body_path: A file with contents describing the release. Optional, and not needed if usingbody.draft:trueto create a draft (unpublished) release,falseto create a published one. Default:falseprerelease:trueto identify the release as a prerelease.falseto identify the release as a full release. Defaultfalse
We have successfully created our workflow for automating github release . Now, for each tag that you are pushing, a new release will be created in Github automatically. Will test everything together after automating the Bintray upload flow.
Automating Bintray Upload
I am assuming that you already have a bintray account and configured the gradle client. If not, please create and configure Bintray account. Also configure the build.gradle files with the code as below.
Open the publish.gradle, you can see that we are accessing 2 environment variables from the system — bintrayUser and bintrayApiKey. If you are accessing these values from properties file, please change to environment variables.
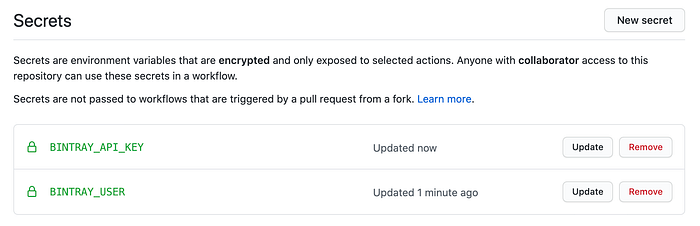
Now go to Settings tab on your Github repo and click on the Secrets section. Add 2 secrets named BINTRAY_API_KEY & BINTRAY_USER .These keys will contain your Bintray api key and user name respectively, you can copy the values from your Bintray profile page. We will use these secrets for creating the above mentioned environment variables.
As I mentioned earlier in this article, a workflow can have multiple jobs. So rather than creating a separate workflow file, will add bintray upload as a job in to the same workflow file. You can even add this as steps in the same job without creating a new job.
The line needs: release adds a dependency on previous job to make the jobs run in sequential order.
This job has 3 steps.
In first step, same as previous job, check-out the code.
Second step uses setup-java action , which will install Java.
In the Publish library step, we will initialize the environment variables from the secrets which we have created earlier. And finally will run the bintrayUpload command, which will upload library to Bintray.
The final release.yml after combining both jobs will look like :
Done.! Now push the workflow file and will see how it works.
Testing
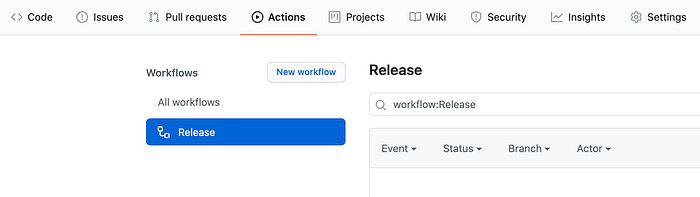
- Go to Actions tab on your github repository, the workflow which you have created will be displayed there.
2. Now create a tag and push it.
3. Go to Actions tab again, you can see that the workflow is started executing.
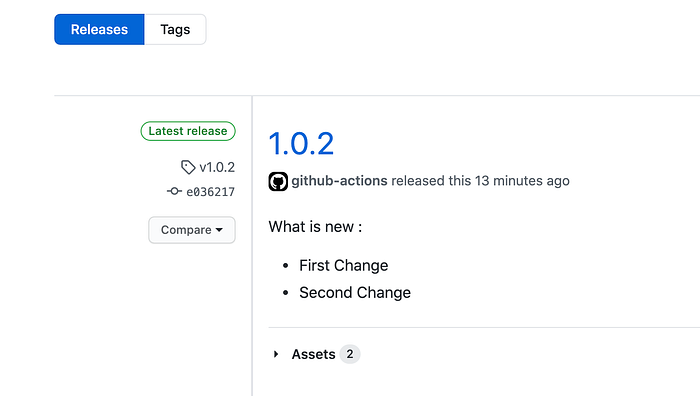
4. Once the job completes , go to releases, the new release will be added there.
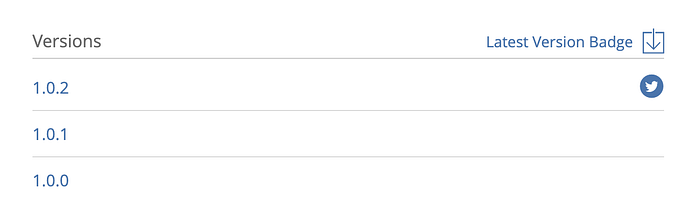
5. Go to your bintray account and navigate to your libraries page, you can see that your new version will be listed under the versions section.
Wrapping up
Here I have shown how to automate Android library release & publish using Github actions. For future releases, you don’t need to do anything manually. Once your new update is ready, create a tag and push it, a new version of the library will be created in Github and will be automatically published to the Bintray. Don’t forget to update library version and changelog before creating the tag.
The explained workflows is simple, which makes your library release faster. You can add more jobs to make it even better ie; for generating tags, code analysis, test execution, building apk etc. You can find more cool actions on Github marketplace.