Android Studio: Layout Inspector
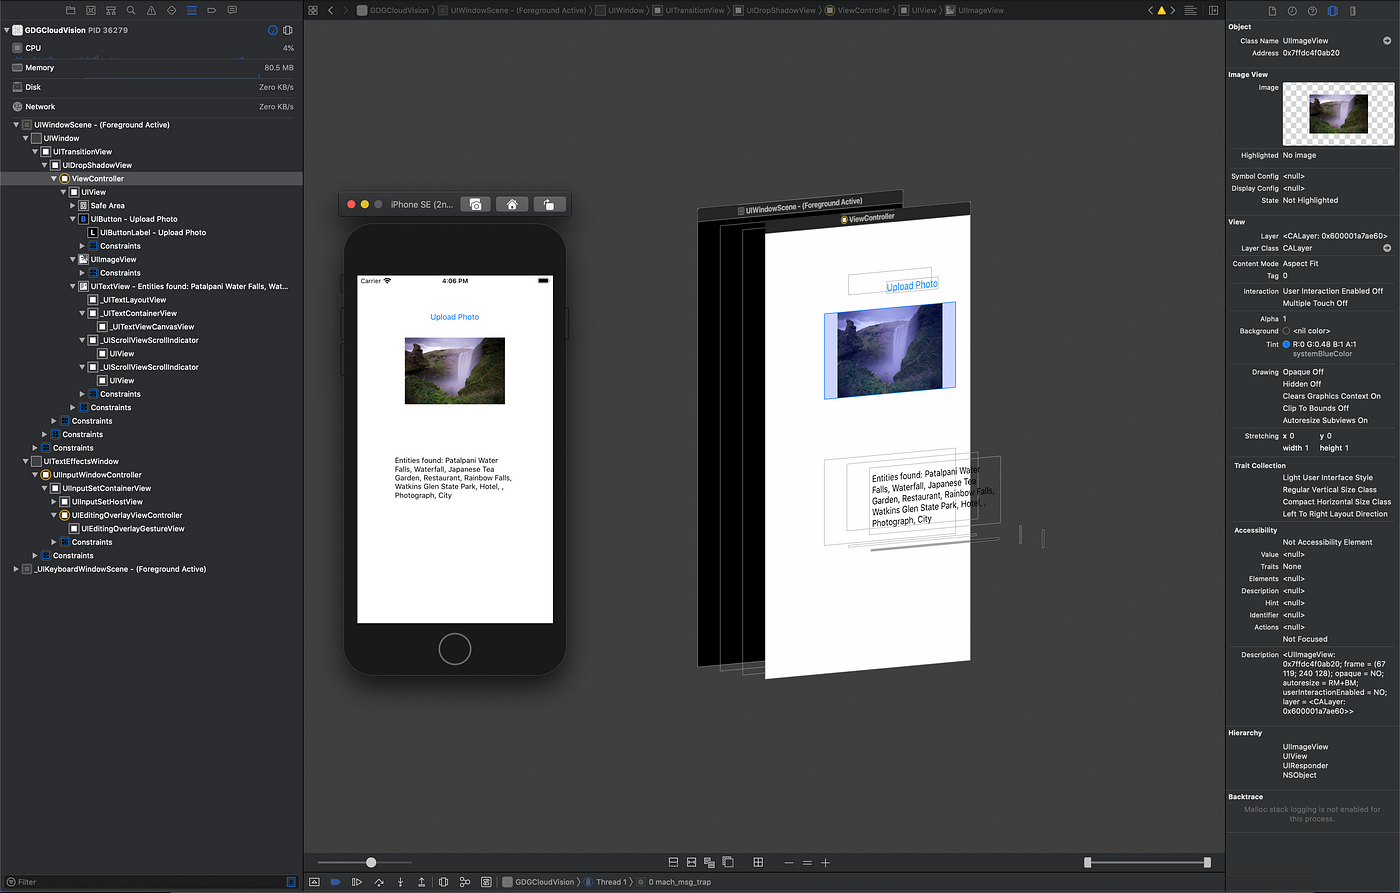
Android Studio 4.0 was recently released to the stable channel and it came with many new features. A feature I’ve been looking forward to has been the Layout Inspector. I’ve been doing mobile development for a while, including iOS development, and when debugging iOS apps, especially when it came to UI bugs, Xcode had a great tool for this. It was called Debug View Hierarchy. This tool allowed developers to capture a screen running on your simulator or on device and inspect all the elements, constraints and attributes of the view.
I always wanted this in Android and i’m happy that it’s now be released in the latest version of Android Studio.
Getting Started
NB: You need to be on Android Studio version 4.0 or higher to use this tool.
If we open Android Studio, at the bottom right we will see a tab for the Layout Inspector. Once we have an app running either on an emulator or on a real Device we can open this tab and should start seeing our app we running show up in the inspector.
The Layout inspector has 3 parts to it: Component Tree, Inspector, Attributes. Let’s go through these sections and look at them in more detail.
Inspector
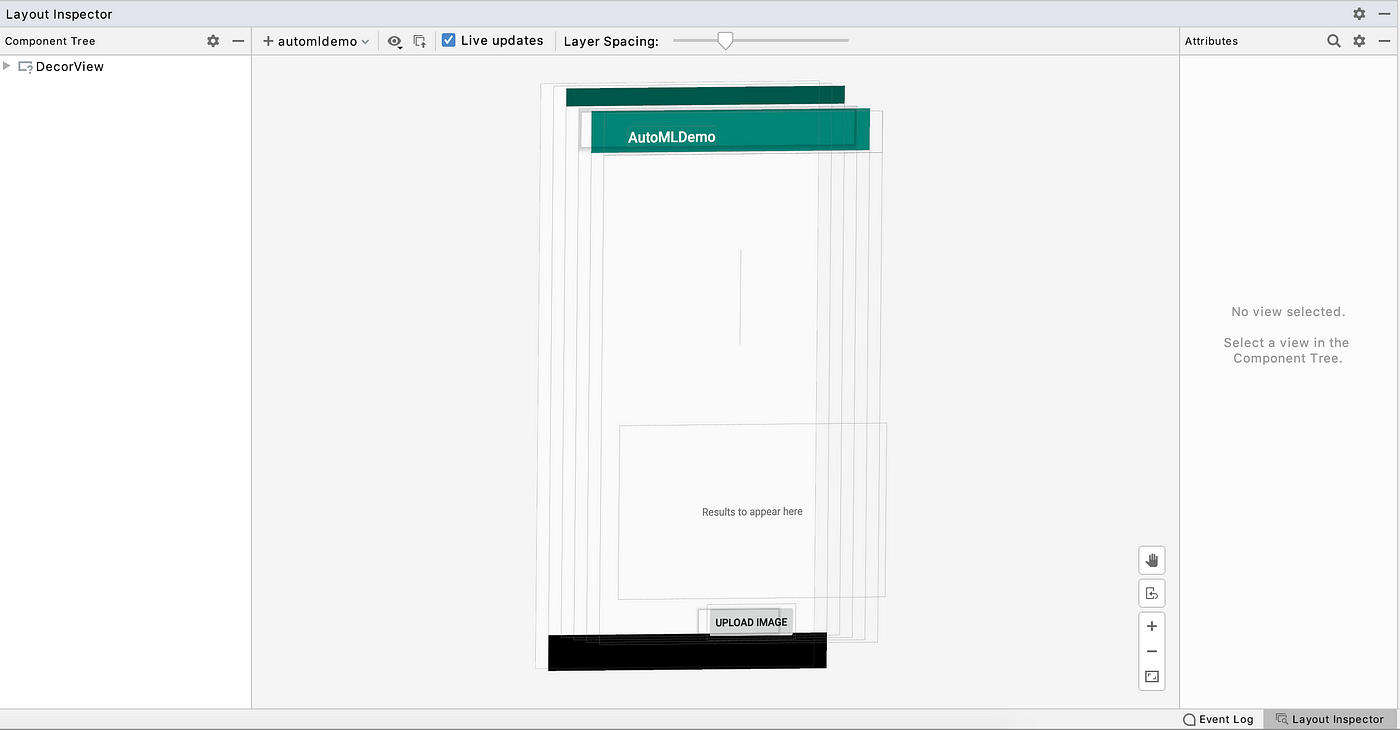
The inspector is our visual canvas of the current screen displayed on our emulator or device. This visualization is interactive, so we can click on our components to inspect different attributes.
The inspector also has a few options of its own. We have “view options” which allows us to show borders for each view component and “view label option” that shows us the id we have named that view component.
We then have the load overlay option which is great if you have designs from your UI designer. You can overlay these on your captured screen so that you can get your designs pixel perfect. This feature is awesome as it will help with reducing visual bugs from design to develop. It has an alpha value slide so you can see either the overlay or developed UI and in between too.

We then have “live update”, which will be streaming what is happening on your device to the inspector view. This allows us to see how our app behaves while we navigate through our application. Something to note though, when I had “live update” on, I saw drops in frames and jitter in my app. When disabling live update, things worked smoothly, so this could make your app look like its dropping frames but it’s maybe just the streaming of the data to Android Studio.
Lastly, we have the Layer Spacing slider which separates our view hierarchy and shows us each layer that makes up our component tree. The slider separates each layer so it’s easy to see which components belong to which layer. If we click move our mouse to the left or right over the inspector view, you will see the inspector view give us a 3D view of our layout which is really cool.


Component Tree
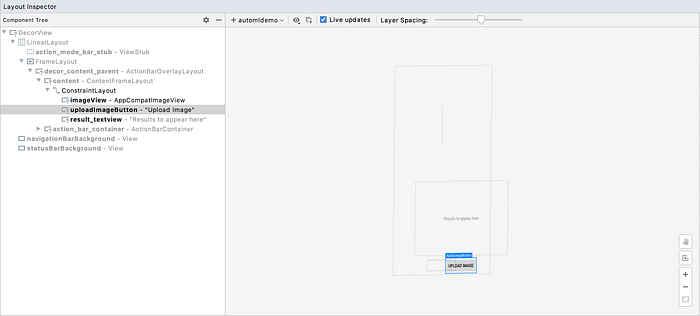
The component tree is the view on the left. This will show you each view component that makes up your view a specific time. This is great because it can show you in real time what your hierarchy looks like. We always want our layout hierarchy to be as flat as possible. This is an easy way for us to find elements on the screen and what values have been assigned to it like a buttons text or what text is being displayed in a text view.

In the component tree we can also hide and show specific views. We can right click on any element and tell the inspector to only show us only that element by saying “Show only Subtree” or you could hide that specific element or view group by selecting “Hide SubTree”. This is useful if you want to deep dive into one view and not see the views of the rest of the screen in the inspect.
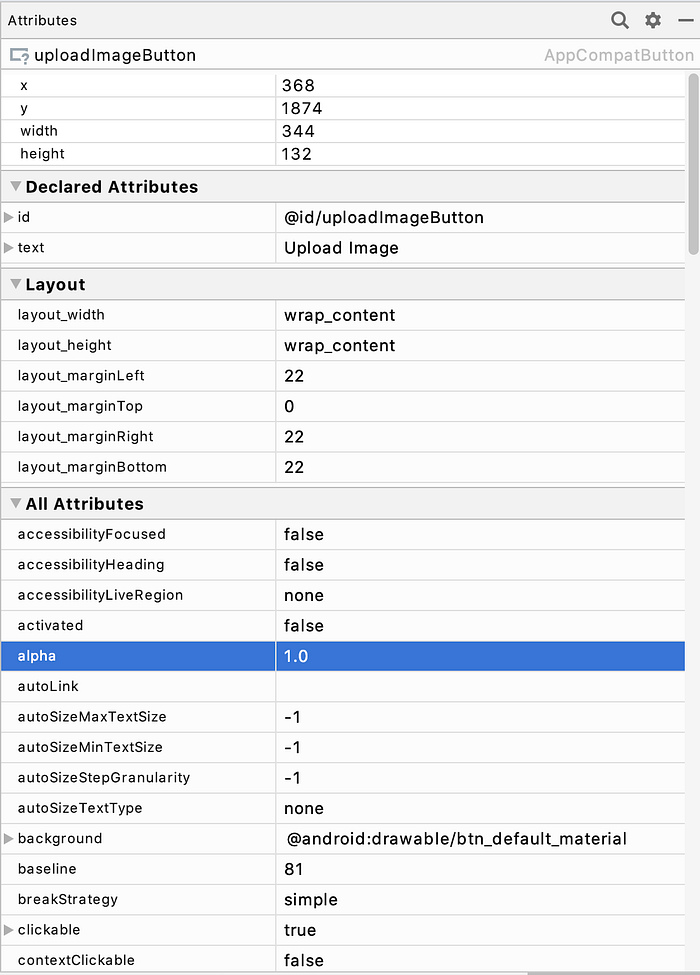
Attributes
The attributes view is on the left of the inspector. This allows us to get insights to each of the components on the screen. If we select any component we will see the attributes view populate with all the values associated with that view. We can now see in real time dimensions of our view, margins we might have put in place and other more specific attributes to that view such as text colors, click listeners and many more.
This helps us see the state of a view component at any point in our interaction with that view. This will go a long way in making the view behave as they should.
Final thoughts
This is a very welcomed tool to have part of Android Studio. It will help many developers be more productive in debugging views and UI imperfections. I have been using it for just over a week now and it’s been fantastic. I hope it will be everyone else. For more information on the layout inspector you can refer to the documentation.
https://developer.android.com/studio/debug/layout-inspector
If you have tried it and have any experience with the tool, comment down below.
Stay in touch.