
10 Tips for Android Library Developers
Libraries are certainly something developers are dealing with every day. They help make big projects modular, giving us lots of advantages like Gradle’s selective module compiling for faster build time and smoother git flows. If some libraries are strongly related to some particular features, they also simplify the creation of different feature modules for dynamic delivery with Android App Bundles.
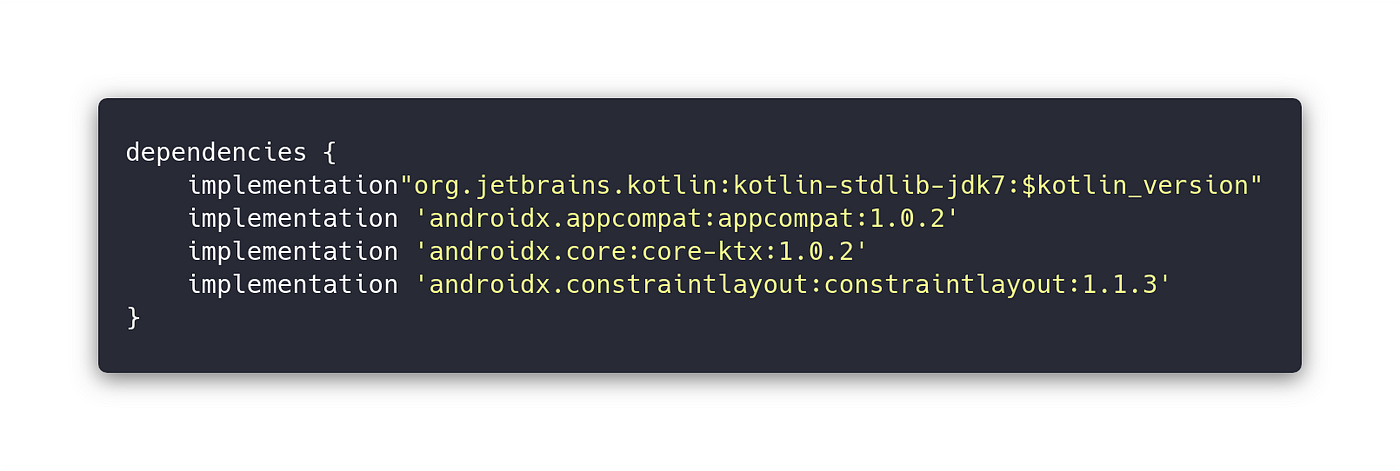
And, honestly, just look at how your build.gradle changes day after day…

So, if you’re distributing a library or just maintaining some library modules in your private project, here are some tips that may be useful to you.
1. Migrate to Android X
Please, really, migrate your library to use Android X artifacts. Most of the times it’s really effortless, just a matter of Refactor → Migrate to Android X in Android Studio.

Little recap: at I/O 2018 Android moved all support library code to a consistent, separately maintained from the Android OS namespace named Android X.
Ideally, all app dependencies should use Android X packages to avoid conflicts. In reality, Google made an efficient tool called Jetifier that automatically migrates existing third-party libraries to use AndroidX by rewriting their binaries. But of course, this will waste precious time at build time.
What can you do
As library developer, if you refactor your library to use Android X, you’ll make a breaking change because users that are still on support library can’t include it anymore.
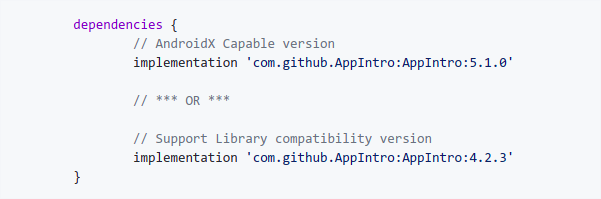
That’s why it’s a recommended practice to release a major version of your artifact with Android X support and include in README which is last version still compatible with Support Library.
That’s what we did with AppIntro:
2. Use Semanting Versioning
You’ve probably already heard of it. Semantic versioning is quite important when releasing software that other people are using to indicate what is changing between releases.
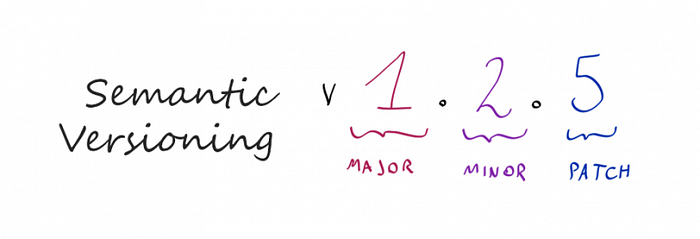
Each version is composed of three elements: MAJOR.MINOR.PATH. You should bump:
- MAJOR version when you make incompatible API changes;
- MINOR version when you add backwards compatible features;
- PATCH version when you make backwards compatible bug fixes;
In this way, users can safely add your lib in build.gradle using:
implementation 'com.example.android:awesome-lib:42.0.+'since latest number will always indicate backwards compatible fixes.
Google and Semantic Versioning
It might seem strange, but even Google fully adopted semantic versioning only a year ago. Before Android X, in fact, version numbers and namespaces were, let’s say, messy because related with the target SDK and not the changes made between library releases. Also Firebase and Play Services adopted semantic versioning starting from 15+.
BTW, a side note: it’s now an anti-pattern to do this (even if before was suggested by Android docs), since each dependency may now be at different version based on the changes made.
buildscript {
    ext {
        play_version = '15.0.0'
    }
}dependencies {
    // DON’T DO THIS!!implementation "com.google.android.gms:play-services-ads:${play_version}"implementation "com.google.android.gms:play-services-auth:${play_version}"implementation "com.google.firebase:firebase-firestore:${play_version}"}
You can safely use latest versions of all libraries even with different versions.
3. Keep resources Private
Did you know all resources in a library default to public?
Yep, that’s true. All your strings, colors, drawables […] are publicly accessible from outside your library.
Especially if you’re not creative with names, this could cause some problems, because users could override by accident some resources just using a res with the same name. That actually happened to me some time ago and I spent several hours trying to debug an unexpected behavior just to find out I had overwritten a style a library declared with the same name.
To avoid that:
- Use a prefix for your library resources. Ex. main_activity_title would become library_name_main_activity_title;
- Define which resources are public:
To make all resources implicitly private, you must define at least one specific attribute as public. Create a new file in res/values/ and call it public.xml . Inside it, add all the resources you want to make public:
<resources>
    <public name="awesome_lib_title" type="string"/>
    <public name="awesome_lib_name" type="string"/>
</resources>
All the other resources you’ve not listed in public.xml will automatically default to private.
4. Group modules with custom path
Especially if you’re working on a complex app with a lot of modules, you may want to group some of them inside a folder. By default, Gradle expects to find all modules in the main folder.
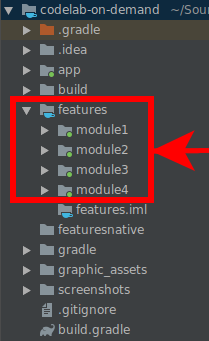
Consider this situation:

We have 2 modules, :app and :core, and Gradle is happy because both are in the main folder. If we move :core inside /libraries, Gradle will complain.
To fix that, we can define a custom path for the module adding a line in settings.gradle:
project(“:core”).projectDir = new File(rootDir, “libraries/core”)It’s a simple trick, but it can drastically simplify the structure of complex multi-module projects:
You can read more about that here:
5. Build Kotlin friendly libraries
When it comes to libraries and you want to provide a nice experience for Kotlin users, the easy way is of course write your own libraries in Kotlin too!
But that’s not so easy.
There is a large corpus of Java libraries which, for various reasons, can’t or won’t port to Kotlin for the foreseeable future. This fact does not render them as obsolete or inferior to a Kotlin library. In fact, a certain portion of Java library authors are sympathetic to Kotlin users and are willing to do more for compatibility.
So if you still want to support Kotlin users, you can provide additional sibling artifacts as “kotlin extensions” that would provide additional syntactic sugar. That’s what Google did with -ktx libraries on Android.
Moreover, if your library is small and you want to maintain one single Java codebase, there are still some tricks for you.
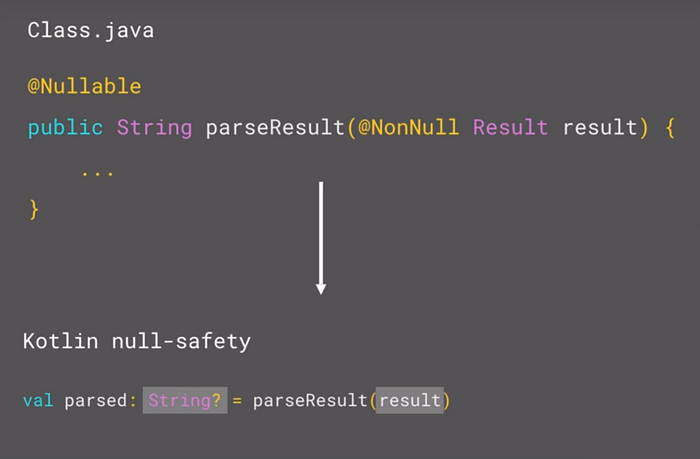
Annotations
Kotlin is all about null safety. To support this in Java, you can use the annotations @Nullable and @NonNull .
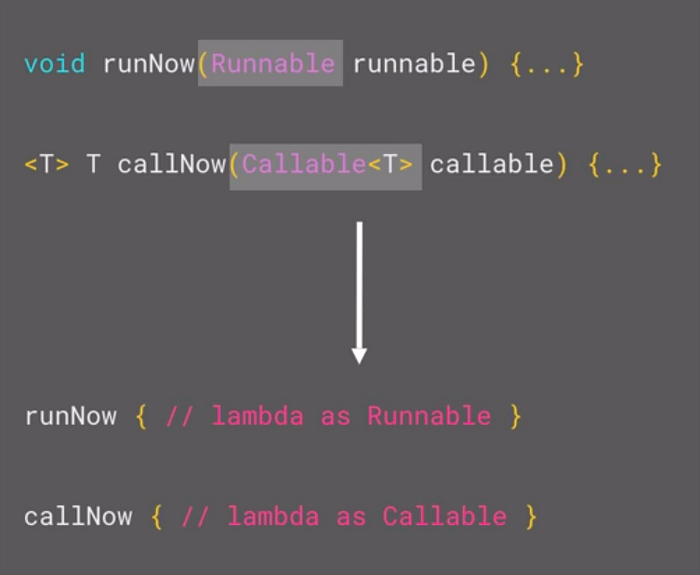
Single Abstract Method
Single Abstract Methods (SAM) are automatically converted to Kotlin lambdas. Plus, if you make sure to pass SAM as last parameter of the function, Kotlin users can take them out of the function parentheses.
For example, Runnable and Callable are SAM, and here’s how those functions are converted in Kotlin:
But wait, there will be more
Do you know what KEEP stands for?
Kotlin Evolution and Enhancement Process. It’s a repo to collect useful proposal for the Kotlin Programming Language to be implemented in future.
Okay, so what’s that got to do with libraries?
There are some things that you can’t express in the Java programming language like extensions functions, named parameters and default parameters. There’s a KEEP open to add other annotations (similar to @Nullable and @NonNull ) to support those Kotlin features.
For example, @KtName could specify parameters name and @DefaultValue the default value of the parameter if not passed in the function.
As result, this is a function in Java and you can see how Kotlin users can still take advantage of handy language features:

But remember, this is still a proposal. You can read more about it here:
6. Merged Manifest tab
When building the final APK, all manifests from libraries are merged together with the app module Manifest, creating a single file, surprisingly called Merged Manifest.
If something goes wrong and you have unexpected errors, Android Studio provides a nice tab to preview the Merged Manifest even before the final APK is built. Just navigate to your app Manifest and click on Merged Manifest tab.

You’ll be able to see with different colors all the changes added by external sources to the final Manifest and easily debug issues.
7. Override library min SDK
You probably know you can’t include a library that’s using a minSdkVersion higher that your app. If you’re able to manually handle an incorrect behavior on older Andorid versions and you want to include the library anyway, you can override <uses-sdk>:
<uses-sdk android:targetSdkVersion="28" android:minSdkVersion="18"
      tools:overrideLibrary="com.example.awesome-lib"/>
An app with the Manifest above, will be able to include awesome-lib that’s only supporting minSdkVersion 21:
<manifest xmlns:android="http://schemas.android.com/apk/res/android"
          package="com.example.lib1">
   <uses-sdk android:minSdkVersion="21" />
8. Include a ProGuard config
Instead of writing custom ProGuard rules in the README of your library, you can actually ship it with some ProGuard config already included.
That’s valid, for example, if you’re making an SDK to distribuite as .aar, because it will not work with regular library modules in a project.
You can add those lines in your lib build.gradle file specifying the path of the file containing the additional ProGuard rules:
android {
    defaultConfig {
        consumerProguardFiles 'awesome-lib-proguard-rules.txt'
    }
    ...
}
When ProGuard runs on the app module it uses the directives from both the app module and the library, since library’s ProGuard file gets appended to the app ProGuard configuration file at compile time.
9. Include transitive dependencies in AAR
This actually happened to me recently: I wanted to ship a standalone .aar (I could not use any Maven repo) of my library to other developers.
My lib used itself other libraries from other sources. When Gradle was assembling the final AAR, all the dependencies of my library where NOT included in it.
Fat AAR
There’s a handy Gradle plugin called fat-aar that will automatically merge the library and its dependencies in the same AAR. In fact it will become a FAT AAR!
You can read more about how to use it here:
Please note that that’s basically a workaround and it’s not encouraged.
If you publish your library in a local or remote Maven repo, other users will be able to include its transitive dependencies easily, since they’re included in the pom.xml file alongside the AAR with:
implements ('com.example.android:awesome-lib:1.0.0@aar'){
       transitive=true
}
10. Use JitPack and be happy
Let’s say you’ve finally uploaded your library to GitHub and you’re about to release it in the wild. Well, with JitPack, given a GitHub URL, you can easily build an artifact to distribute.
After you submit the GitHub URL, JitPack will build and host the library for you on its Maven repo:

You can try it here: https://jitpack.io
That’s all, hope you learned something new about Android libraries.
If you have more tricks you’d like to share, don’t hesitate to comment or reach me out on Twitter. I’d be happy to learn more!

